How to Make an Adjustable Doweling Jig
I love dowel joinery because it is strong and easy to do, but I didn’t love my doweling jig, so I decided to make one!
Check out the full build video below!
Links below are affiliate links, I get a small commission if you click on them, at no extra cost to you ;)
The first thing to do is print out the template here —> Doweling Jig Template
(Make sure it is scaled to 100% in the printing options.)

Cut some 3/4” Plywood to the sizes indicated on the template (leave the fence piece long to aid in clamping).
Cut out the template and use spray adhesive to temporarily place it on the plywood.
There is a center line on the template. Before doing anything, bring those lines down to the side of the jig with a pen. (Not pencil, because you want it to be permanent.)

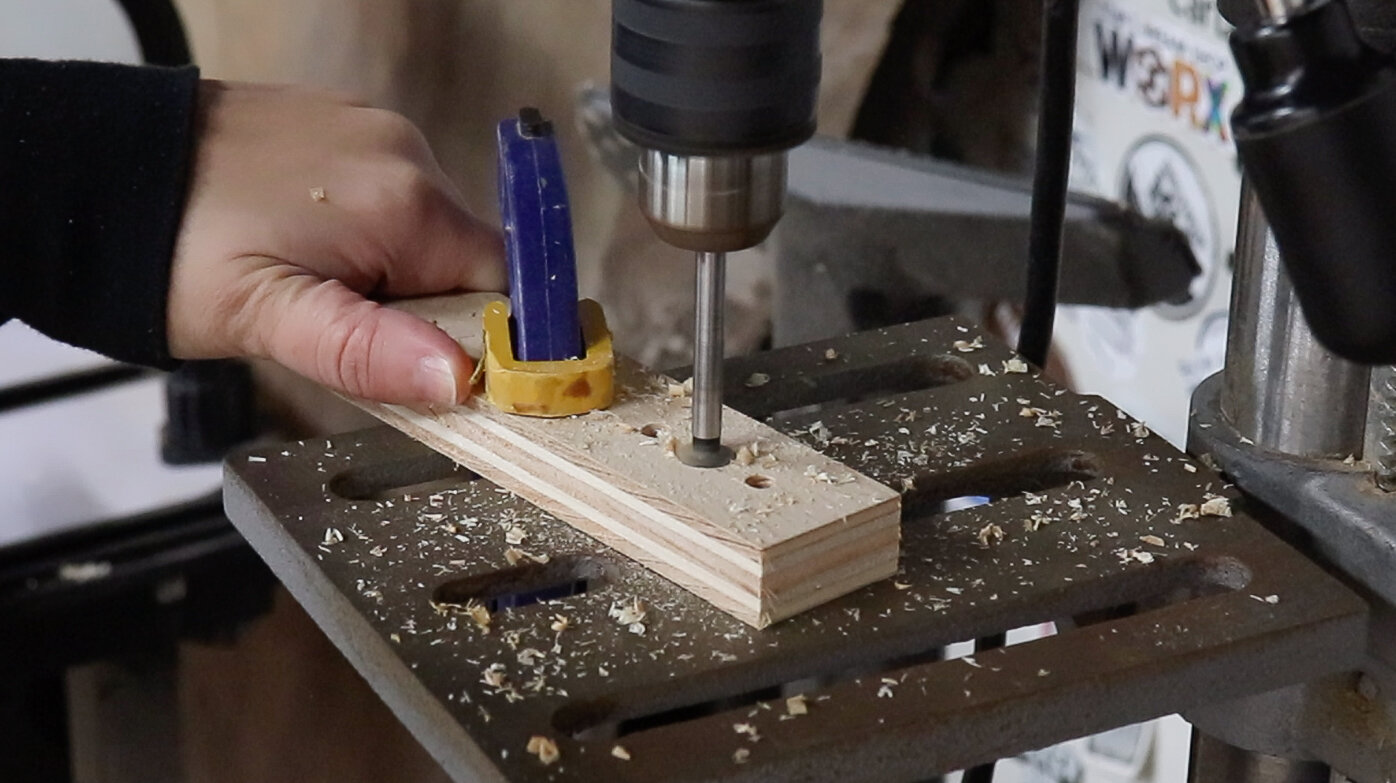
Mark all the holes out with an awl so the bit won’t wander when you are drilling.

It’s best to use Brad Point Bits here for accuracy. They will not wander like regular bits will.
Drill out all the holes on the drill press or with a hand drill.

The fence piece will be held on to the jig using a 1/4-20 bolt.
So drill out a stopped hole large enough to fit that bolt in the middle hole of the fence piece.
The fence piece should look like this. One stepped hole in the center of two holes.
You can cut this piece to size now, it was only left long to help with clamping while drilling.

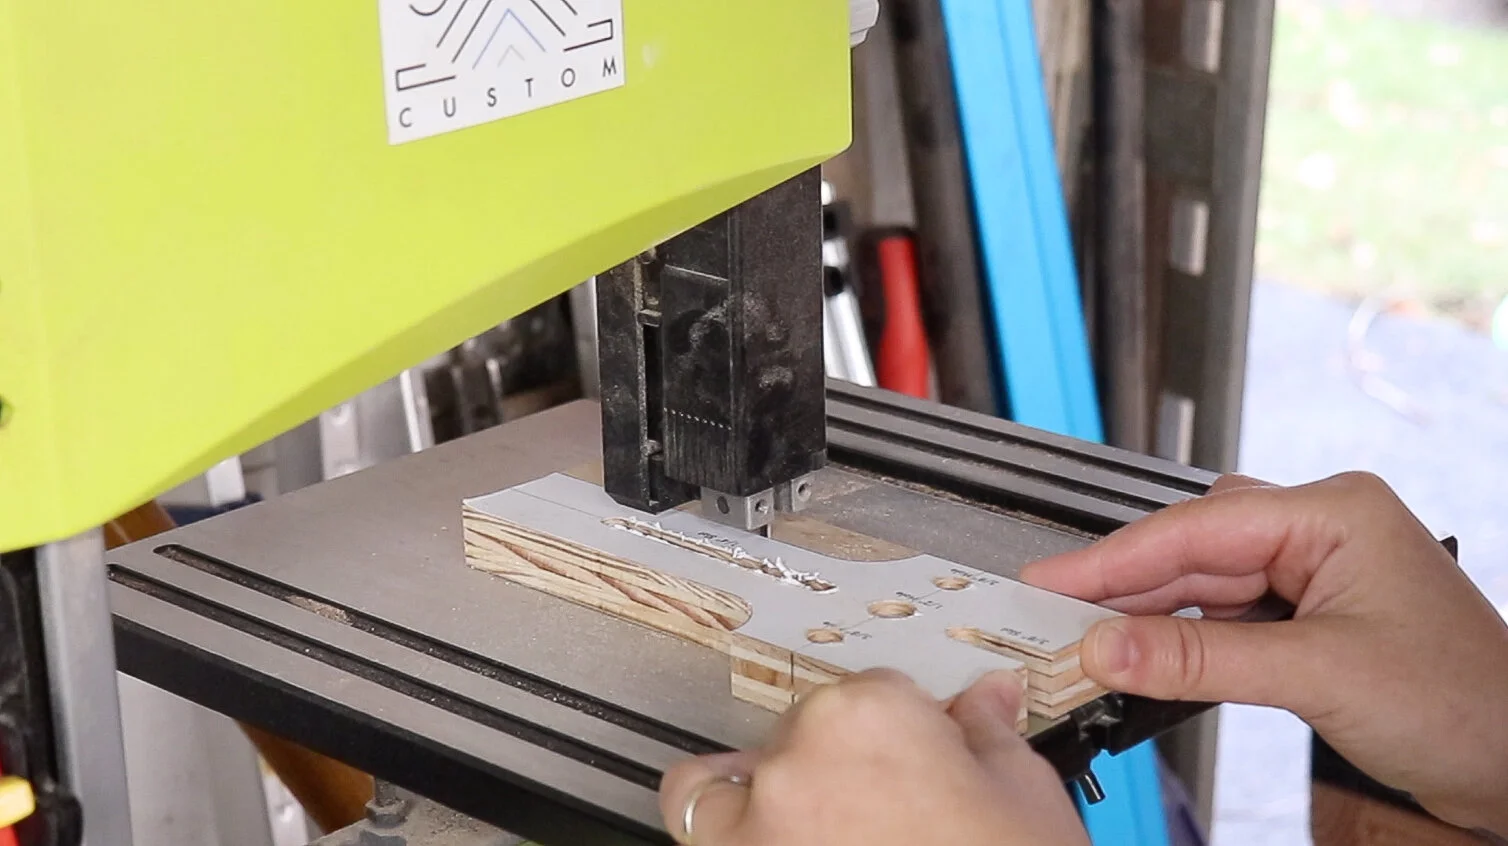
Back to the main part of the jig, there are two slots that need to be made.
One open slot at the top and one closed slot at the bottom.
The open slot can easily be cut out at the bandsaw or with a jigsaw.

The closed slot is a bit trickier.
I made this slot by doing multiple plunge cuts at the router table using a 1/4” bit.
You can also do this by drilling out a bunch of holes along where the groove is supposed to be, then use a file to clean it up. Or you can cut it just like the open slot and glue in a filler piece. Or you can use a jigsaw, scrollsaw, chisel, lots of different ways….

Once the bottom slot it cut, Refine the shape of the handle according to the template or to your liking.
I did this at the bandsaw, jigsaw would work too.
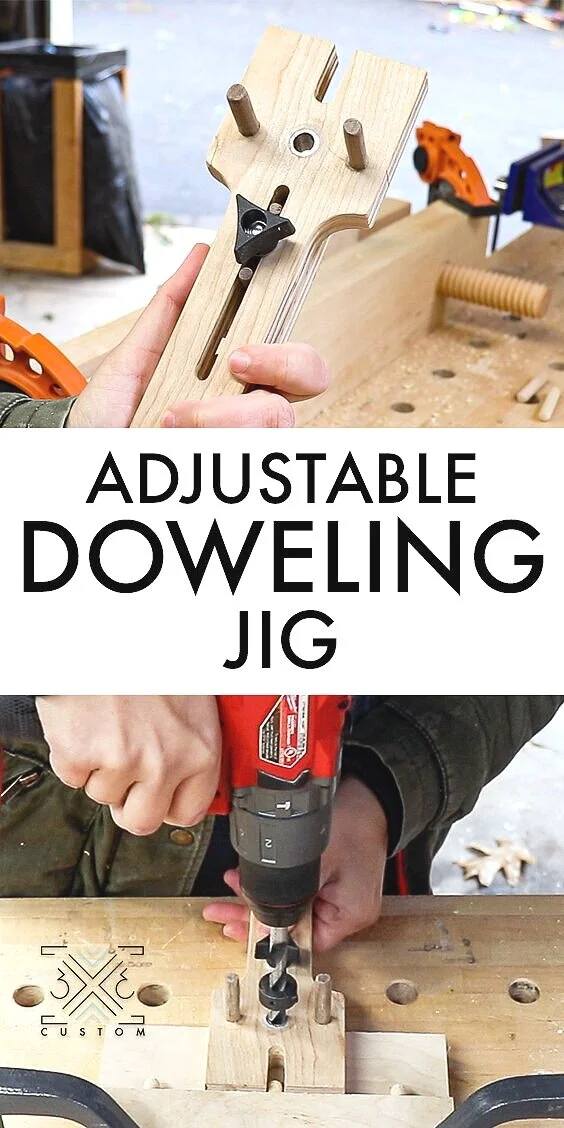
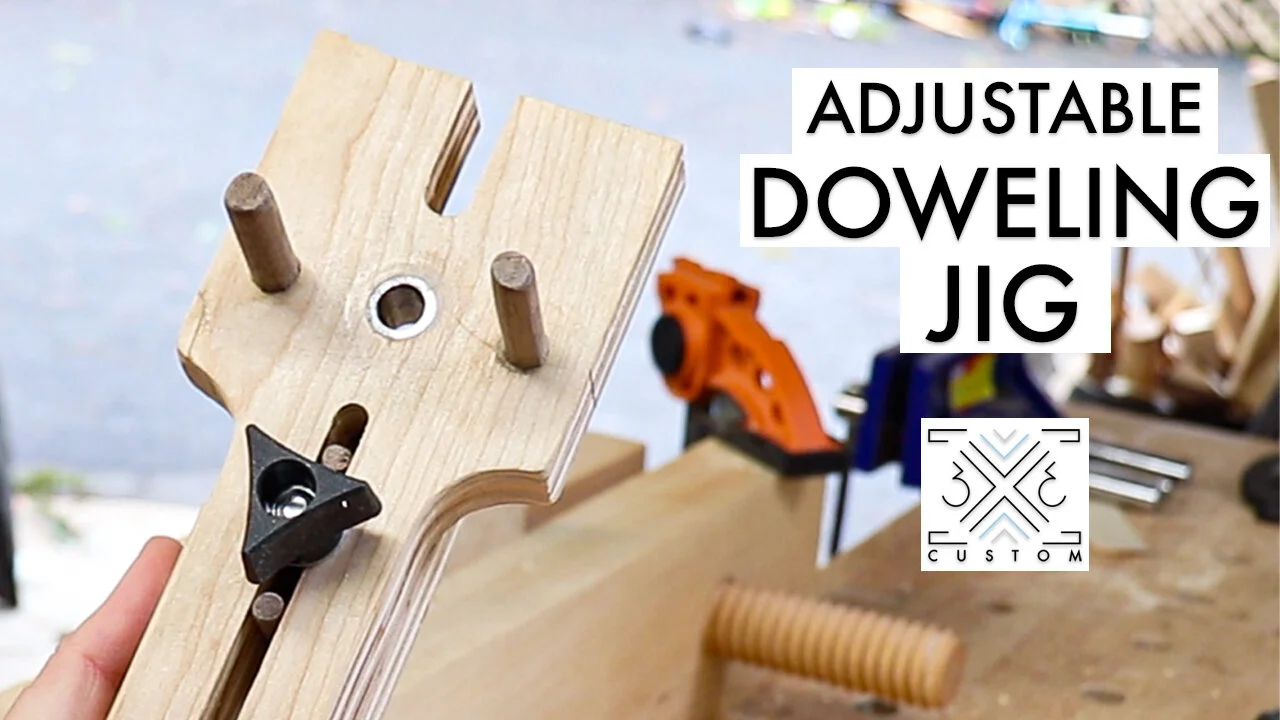
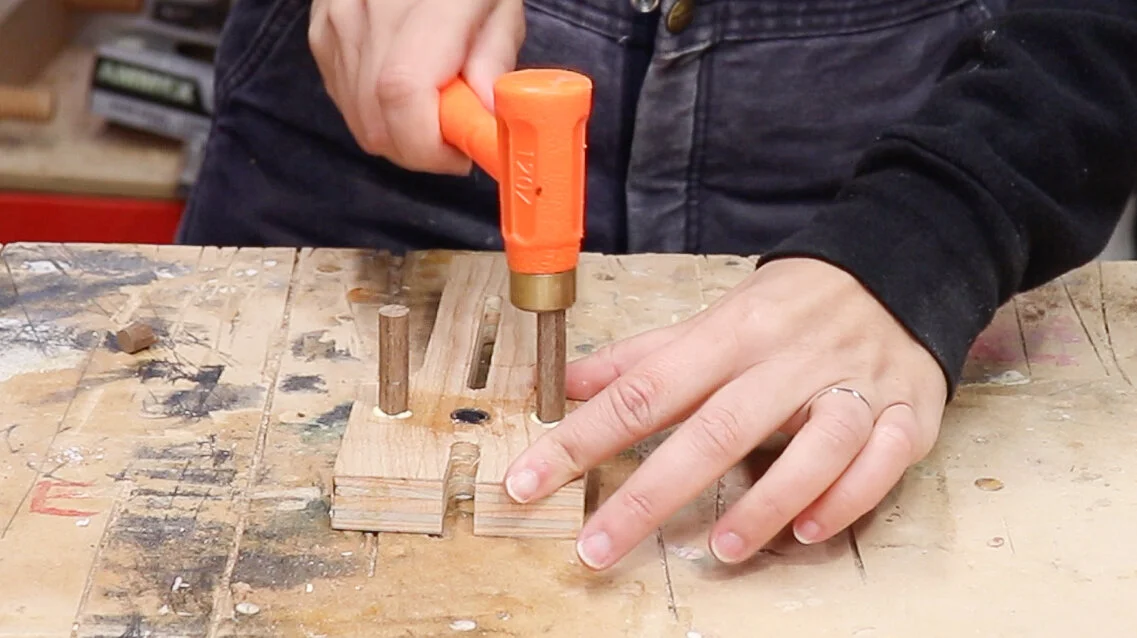
In order for this jig to last a long time, I decided to use a metal tube for where the drill bit will go in. This will prevent wear.
A 1/2” steel tube with 1/16” walls has an inner diameter of 3/8”, so it is perfect for 3/8” dowel joinery.
I cut it to length using my portable band saw. You can read all about it here —> Tools to Cut Metal
It’s a super cool tool to have, but a hacksaw would work too.

I scuffed up the outside of the tubing a bit, then epoxied it into the center 1/2” hole on the main part of the jig.

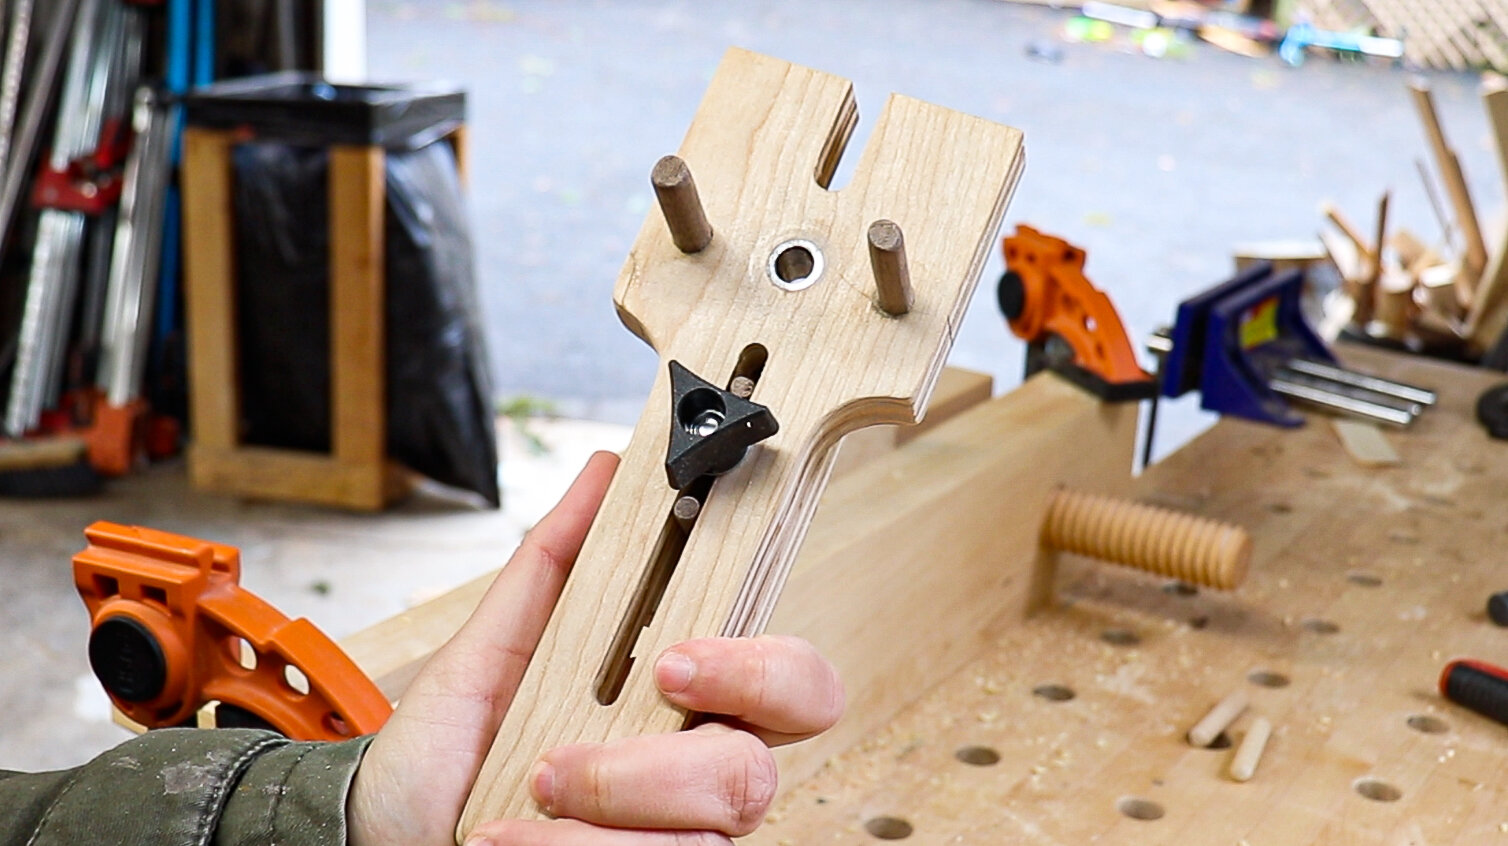
As for the rest of the holes. You can use store bought dowels and just glue them in. I decided to make some fancy walnut ones…
There will be two 3/8” dowels in the main part of the jig and two 1/4” dowels in the fence part of the jig.
And that’s all there is to it!
After the glue dried, I just sanded the edges so it was comfortable to hold, now it’s ready to use!
Here’s how it works…
The top part of the jig has three holes. The middle hole with the steel tubing and the two outer holes with the dowels. Place those dowels around the edge of a workpiece and then twist the jig until the dowels touch opposite faces.
Because those dowels are evenly spaced away from the center hole, this twisting action will always ensure that the center hole on the jig will line up with the center on the edge of the board you want to drill into.
So that’s Step 1: Drill a bunch of holes in the center of the edge on your workpiece.

Step 2: Adjust the fence for the correct width of your material.
To do this place the fence piece on the jig with a bolt, washer and knob.
The two dowels around the bolt will ensure that the fence piece won’t twist and the top of it will remain square.
I added some epoxy to the bolt so that it can be fully tightened with the knob.

To set the fence, place a dowel in one of the holes you drilled in step 1 and place the jig on top of the dowel though the metal tube in the center.
Then adjust the fence and lock it down when it comes into contact with the face of the board.
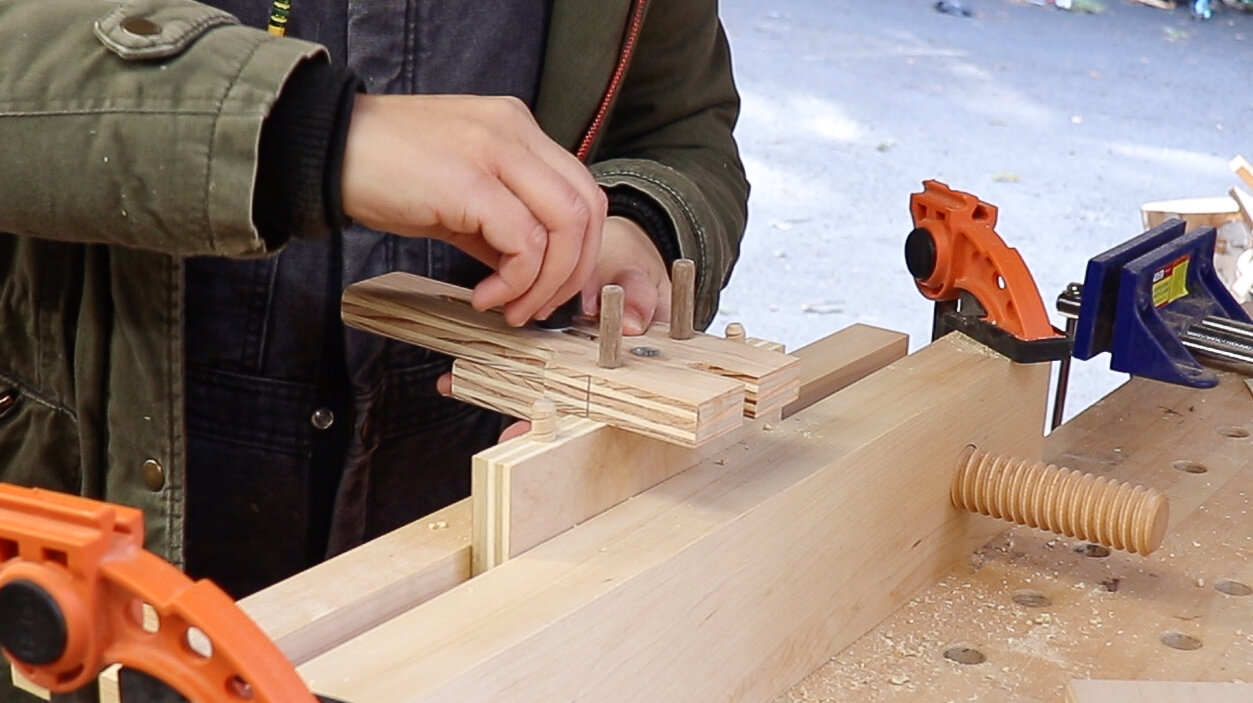
Step 3: Drill the corresponding holes on the face of the mating piece.
To do this, place the first board on top of the board you want to drill on the face of.
Place dowels in the holes you already drilled out and place the jig around those dowels using the notch on the top of the jig.
Make sure the edges of both pieces are flush and square in the sides, and make sure the fence of the jig is touching the edge of the board you want to drill into, then clamp it down.
Once clamped, you can simply place the jig around each dowel from board number 1 and drill away!
The fence on the jig is lined up so the holes will be drilled the perfect distance from the edge of the board. Placing the jig around the dowels from board 1 using the notch will make sure those holes end up lining up with each other.

I love how quick and simple this was to do!

But what if you want to use dowel joinery in the center of a board?

No problem! Just start the same way as before, by drilling holes on to the edge of one workpiece.
Here’s where it’s different…. You will not need the fence piece for this operation, so take it off.
You will however need the center lines you drew on the sides of the jig.
Line those center lines up with your desired location for the mating piece.
Butt the first piece up against the top of the jig and clamp it down.
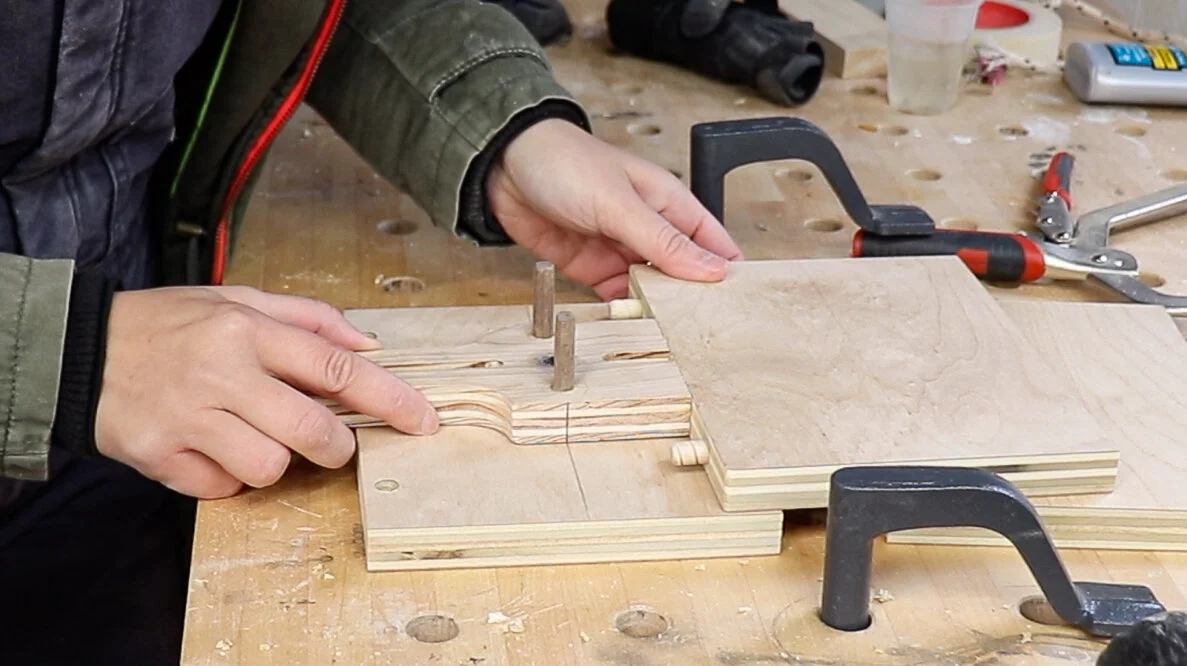
Now just drill out the matching holes by placing the notch of the jig around each dowel on the first board.
(It helps to use a Drill BIt Stop Collar for this.)

If done correctly, the holes should all line up perfectly!

I love how simple and affective this jig is! If you don’t want to go through the trouble of making it though, you can purchase one that actually isn’t so expensive here —> Doweling Jig
Off to go use it on some projects!