
Multi Guitar Rack
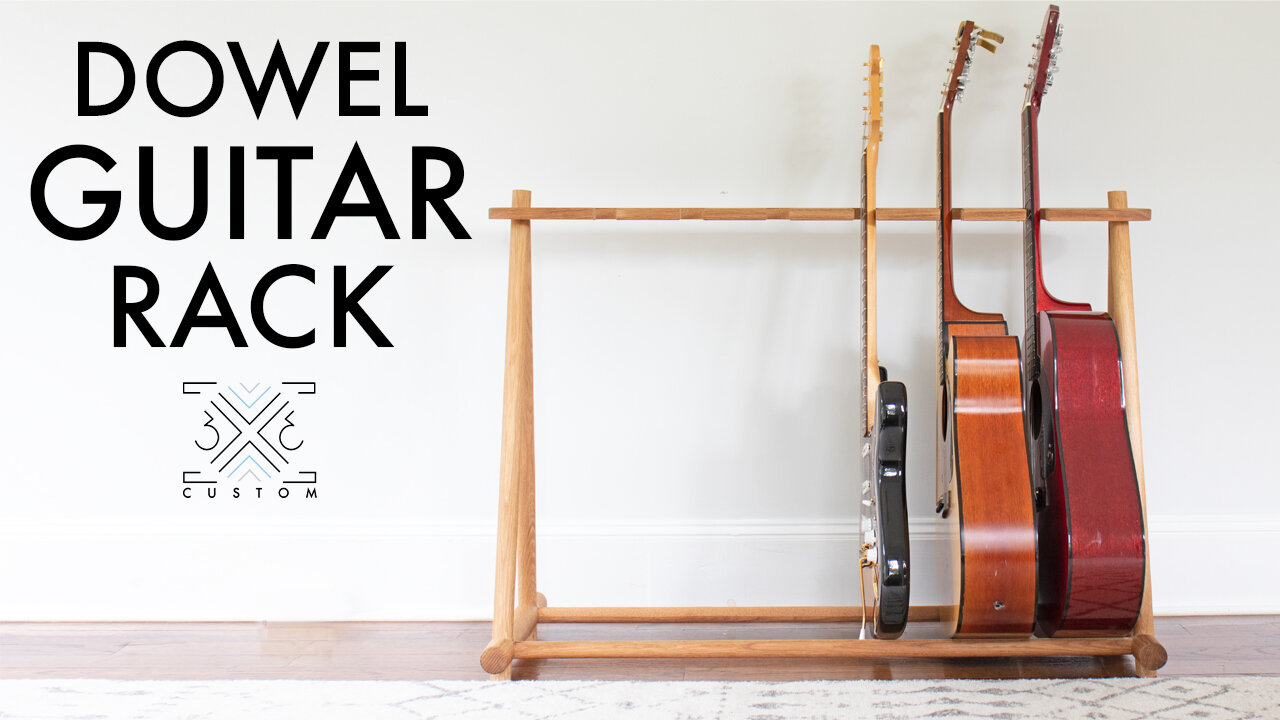
This project has been on my to do list for years… I needed to build a guitar rack.
This is a very simple project that can be done very easily, but I wanted to challenge myself with the design and execution, so I decided to build mine out of dowels. This really makes for a cool modern look, but it was a challenge for sure!
Check out how it all comes together in the full build video below!
While I was making this rack I thought it would be cool to offer you guys templates for sale in case you want to make your own, so you can purchase them here:
GUITAR RACK TEMPLATE
When you purchase the template, you will get a set of plans for a simple guitar rack FOR FREE! If you just want the plans you can purchase them separately here:
GUITAR RACK PLANS
Alright! Let’s get into how I made this Dowel Guitar Rack!
I like to make my own dowels, it’s less expensive and I get to pick any wood I have on hand.
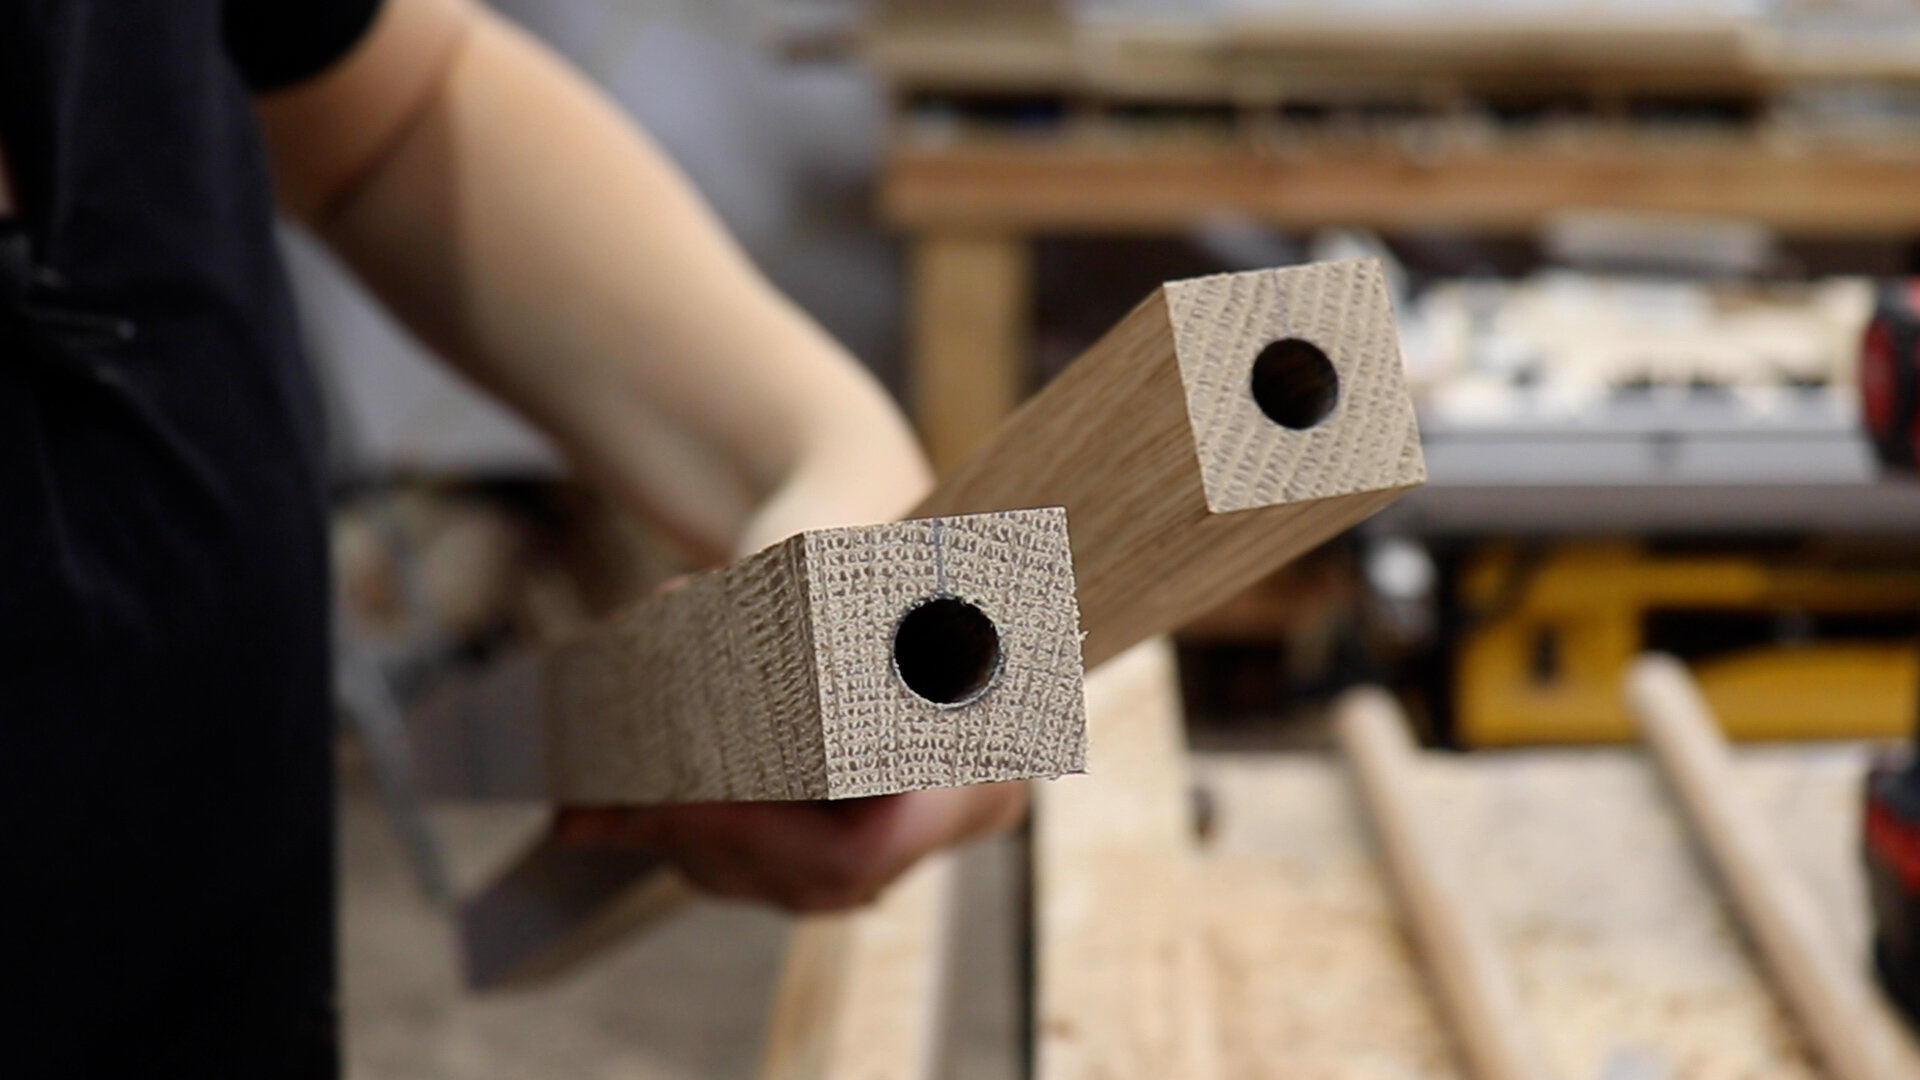
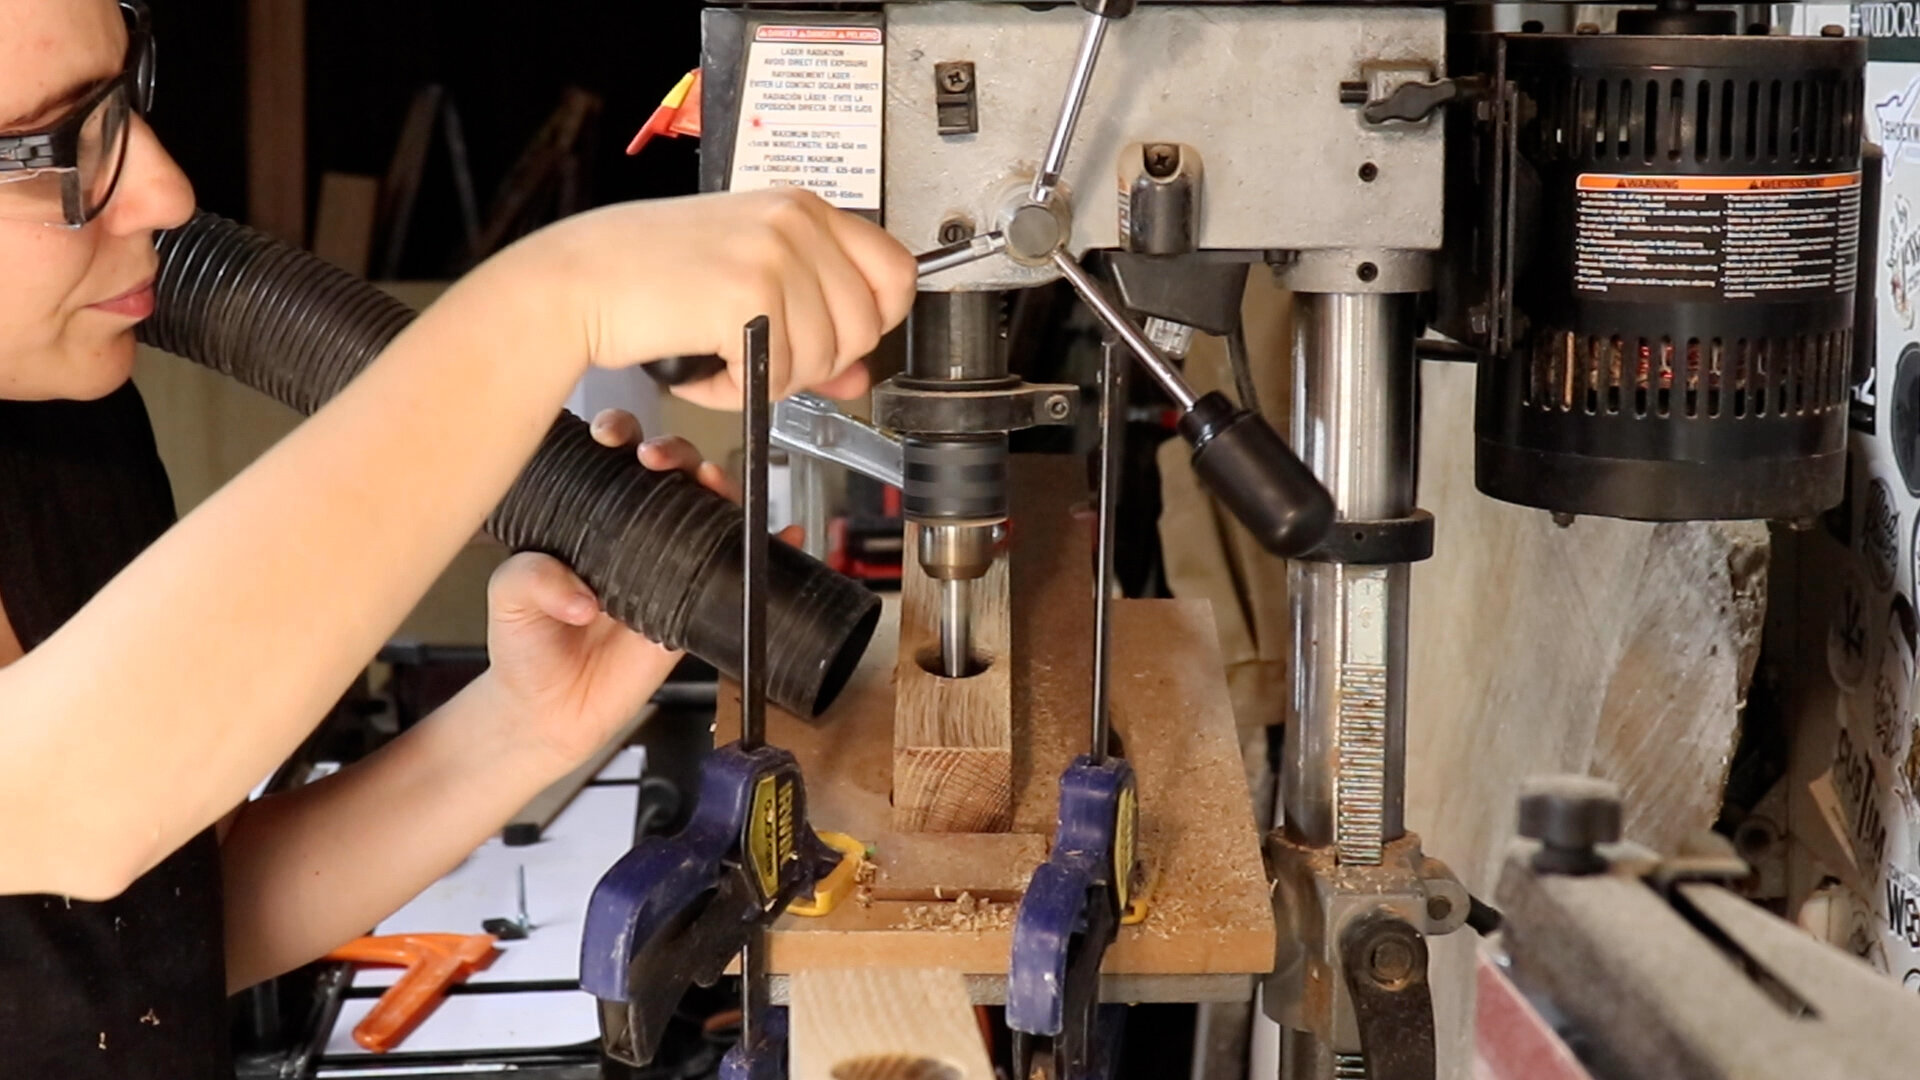
It’s also easier to do all the joinery on the pieces when they are square. So that’s the first step after milling these to size, drill all the appropriate sized holes for joinery.
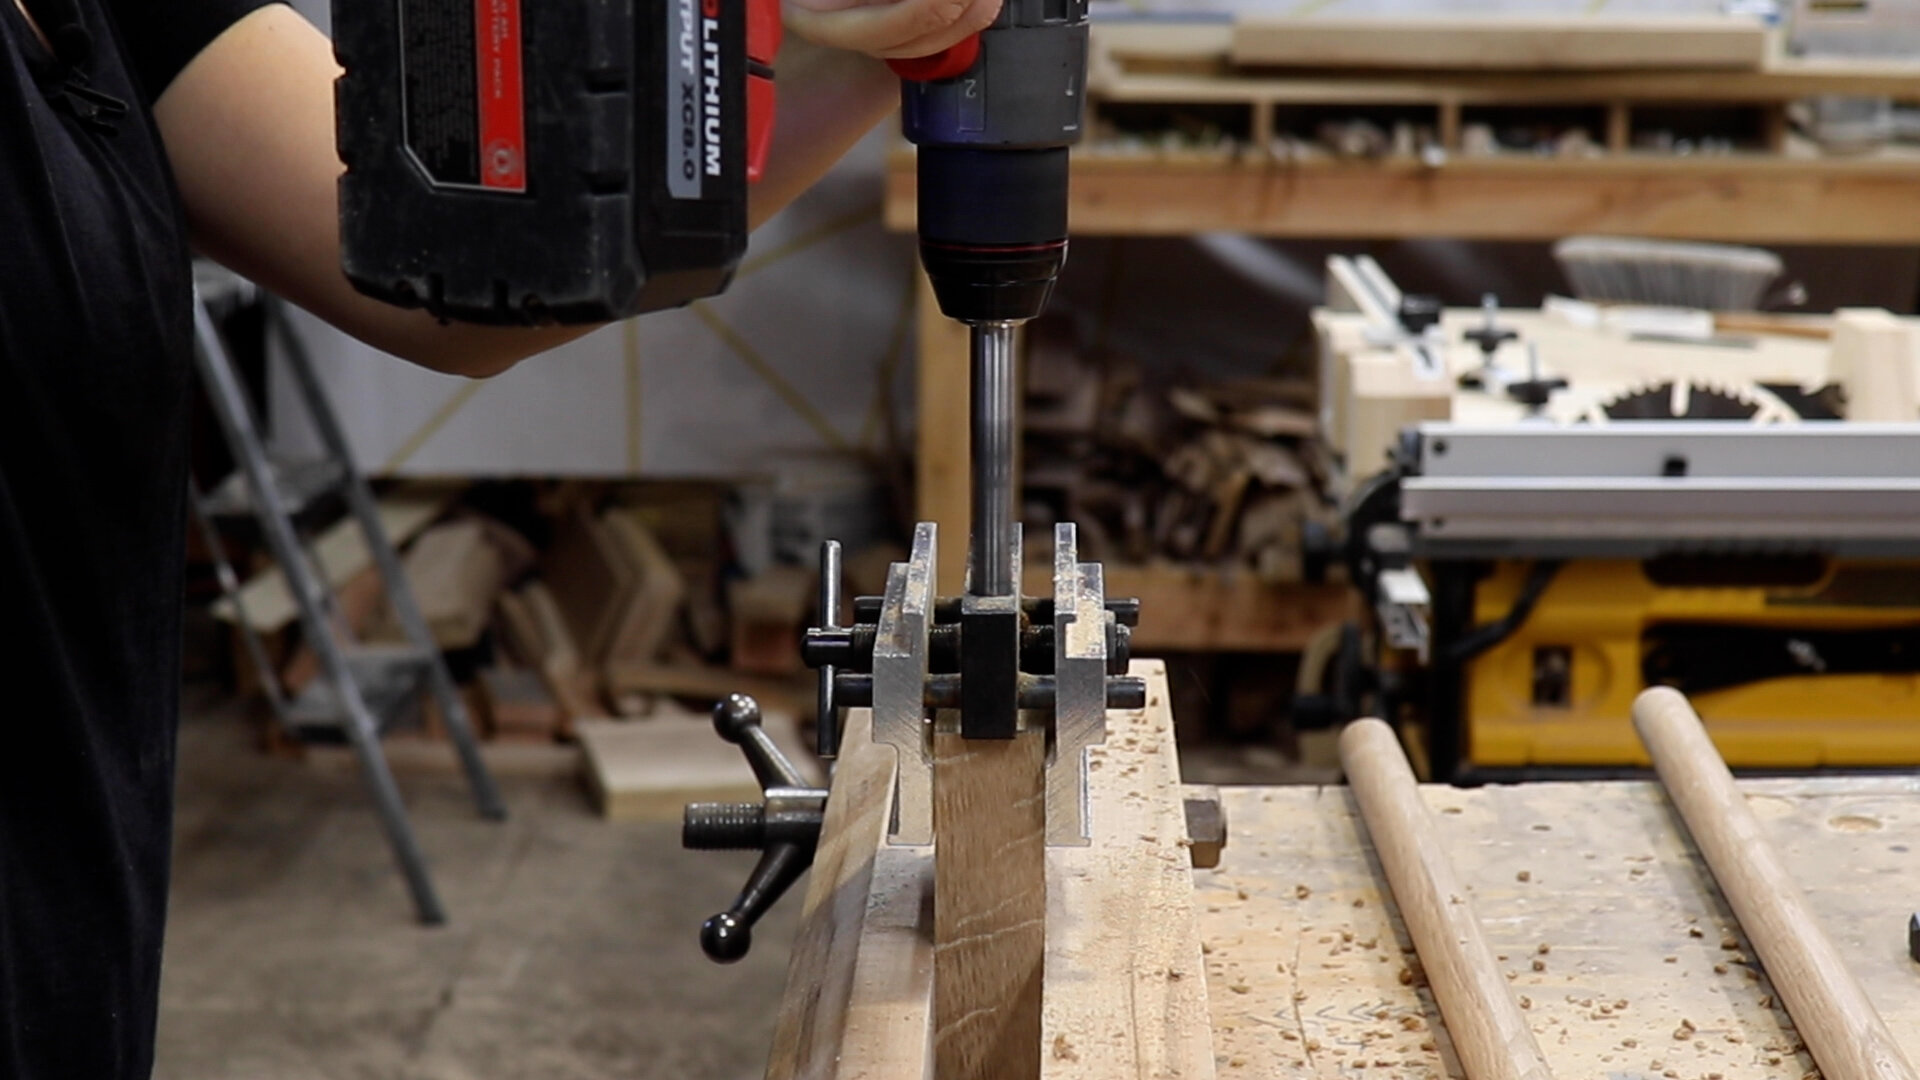
Using a center finding drilling guide block, I was easily able to drill a hole in the center of this square stock.
It would be more difficult if the stock was round, but doable.
It’s also easier to clamp square stock to your drill press table.
Round stock, is doable, but harder… you see the theme here? Ha.
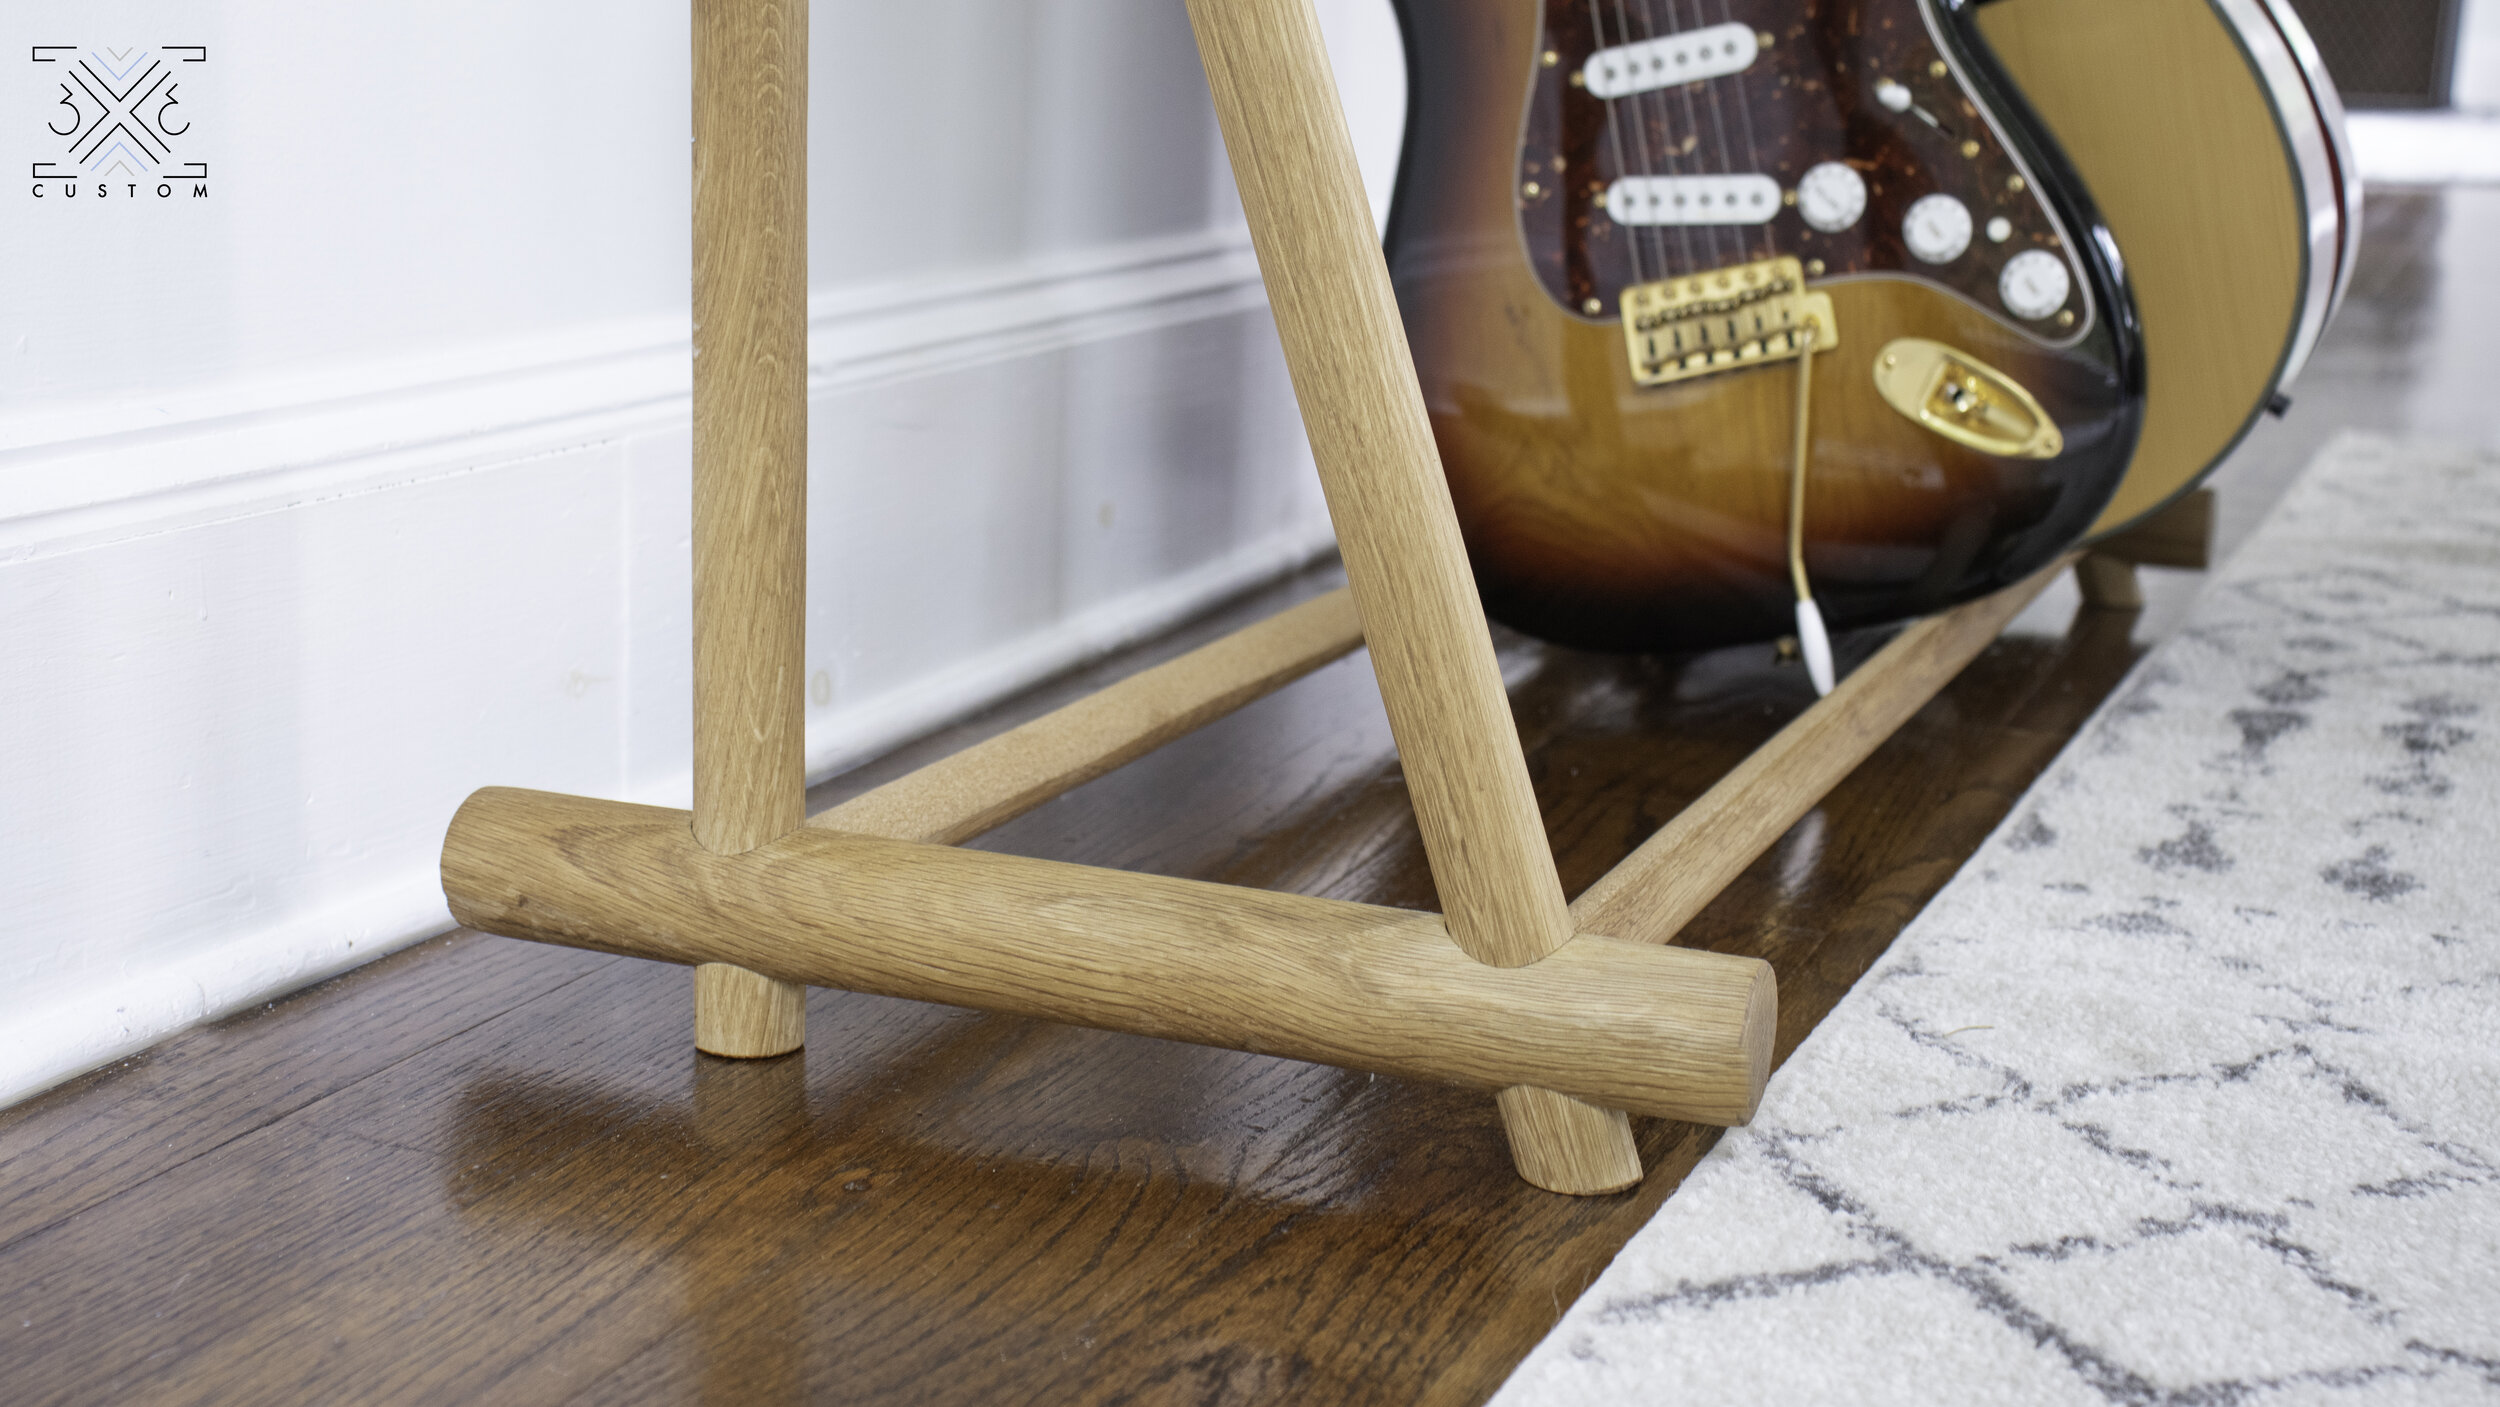
All of the previous holes were at 90 degrees, but one set of holes needed to be angled at 20 degrees so the leg can sit at a 20 degree angle into the base.

I set up a temporary fence on the drill press table so each hole I drilled would be in the exact same spot on every piece.
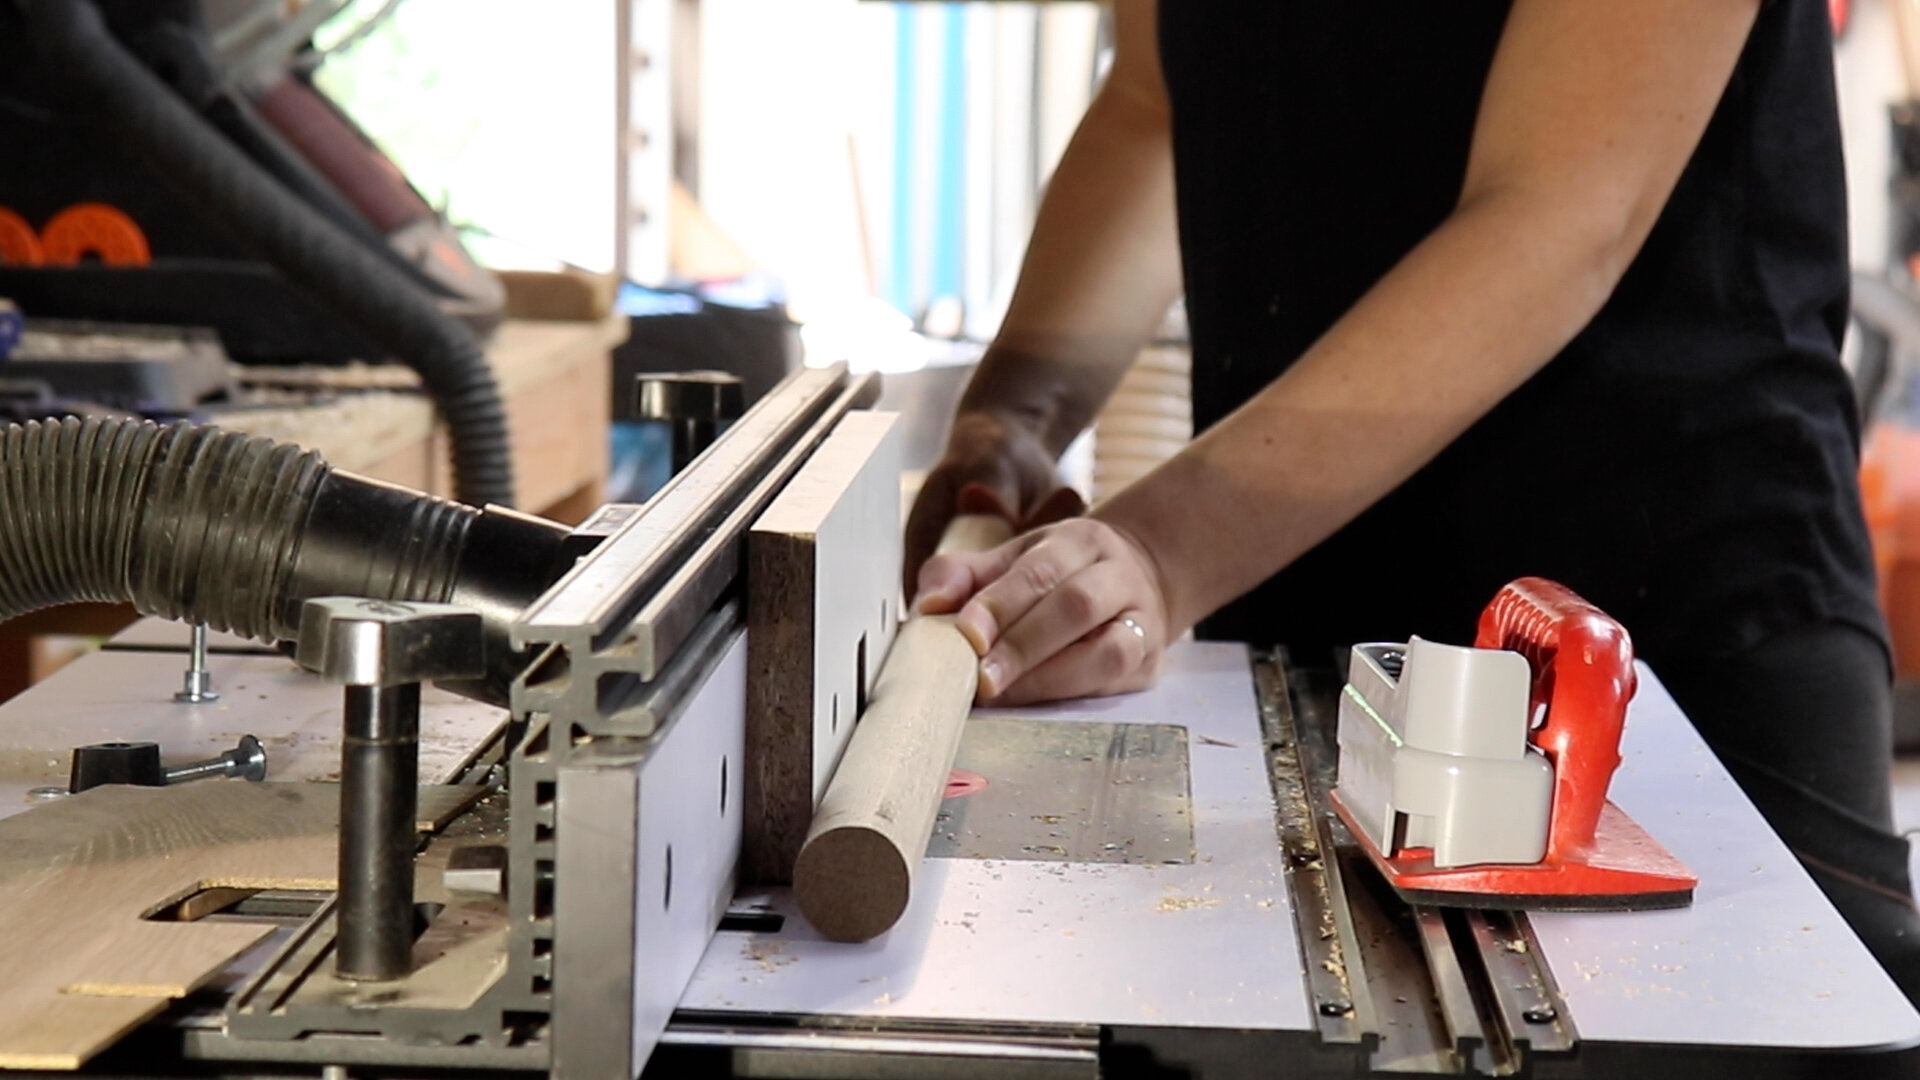
Now that all the joinery is done, It’s time for this square stock to become round.
I don’t have a lathe, so I do this at the router table.
The trick here is to use a roundover bit that is half the diameter of the size dowel that you want. So the radius…
I needed three different sized dowels:
1” - I used a 1/2” radius roundover bit
1-1/4” - I used a 5/8” radius roundover bit
1-3/4” I used a 7/8” radius roundover bit.
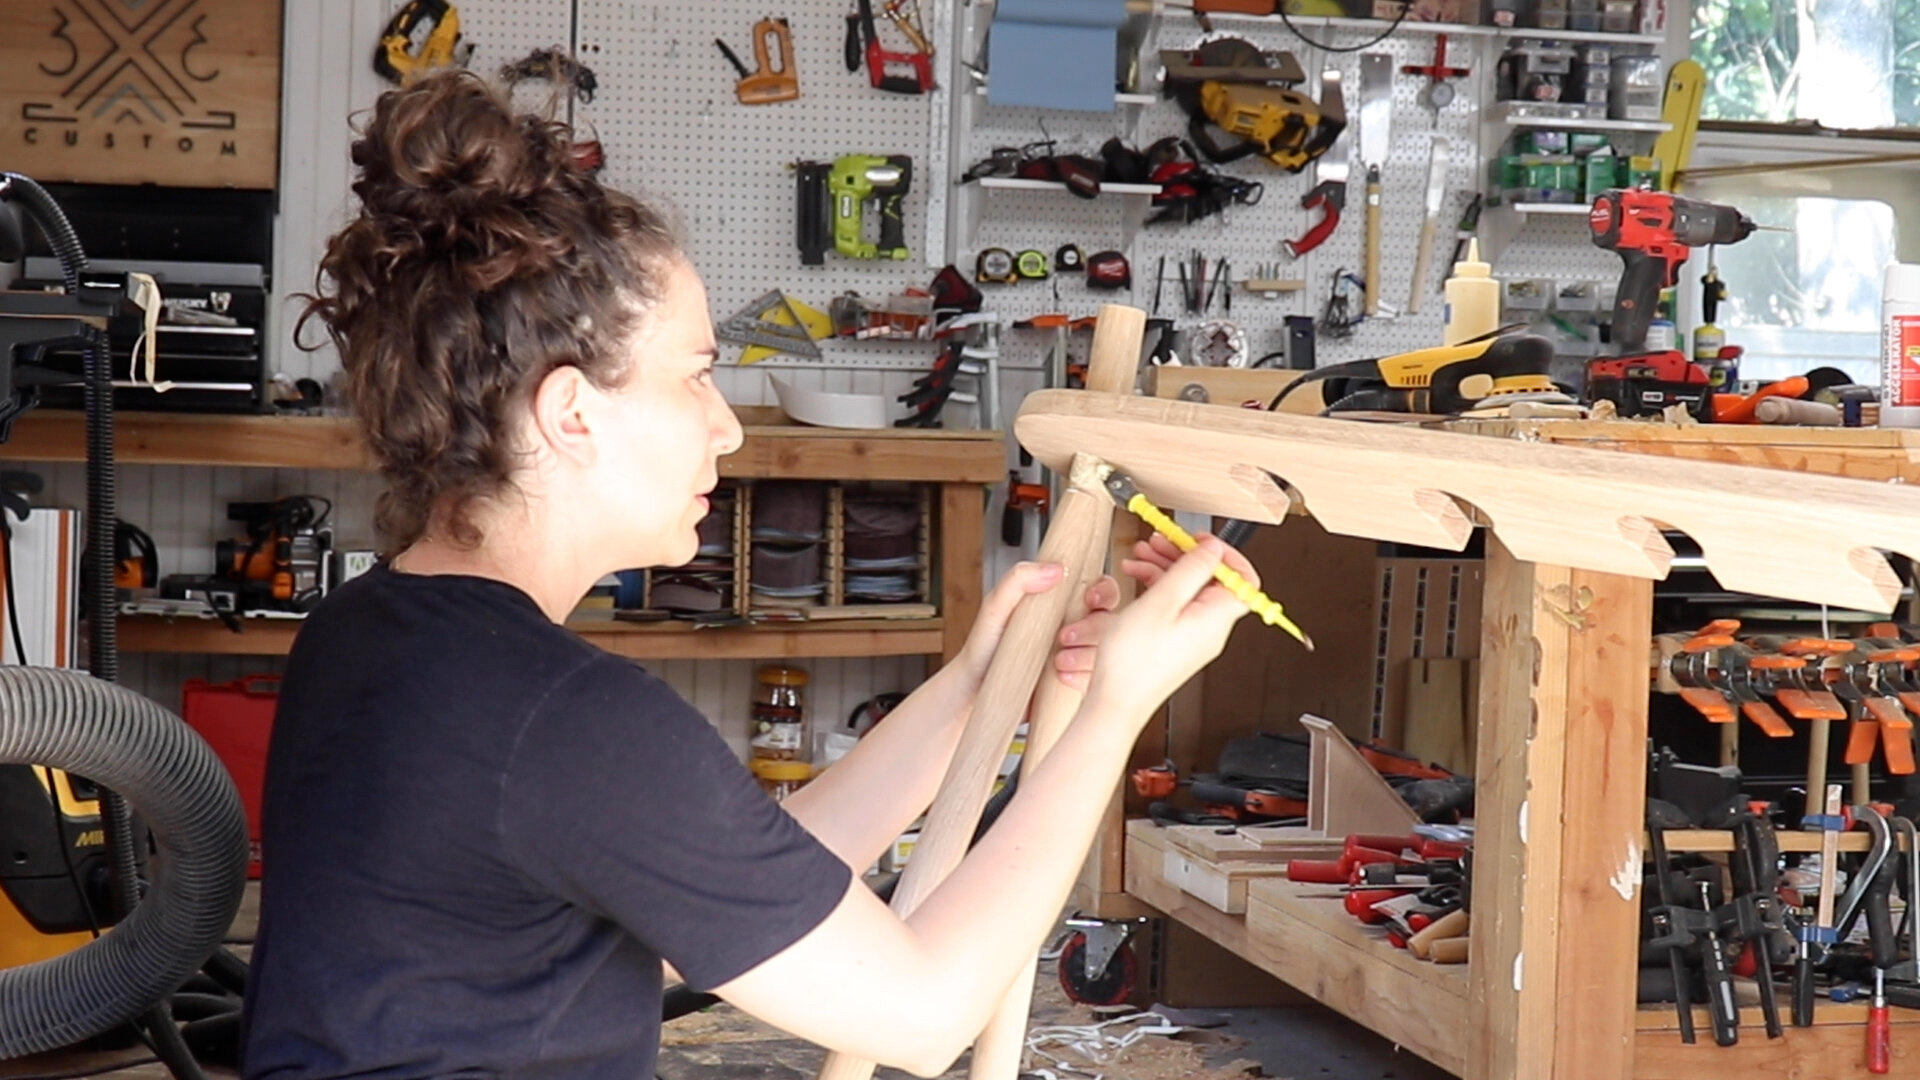
One of the legs sits at a 20º angle to the other leg, this means that piece will need to be cut at a 70º angle so it meets up at correctly.
My saw doesn’t adjust to 70º, so I had to build a holder to make up the difference. This is all described in the full YouTube video.

In order for that dowel to sit flush with the mating dowel, it needs to be curved on the inside of that 70º cut.
I did this with sandpaper on a dowel of the size I want the curve to be.
I think this can be done in a better more efficient way… more experimenting to come.

The cut off from the 70º cut made for an excellent jig to drill the hole in the upright at the right angle. Cool.

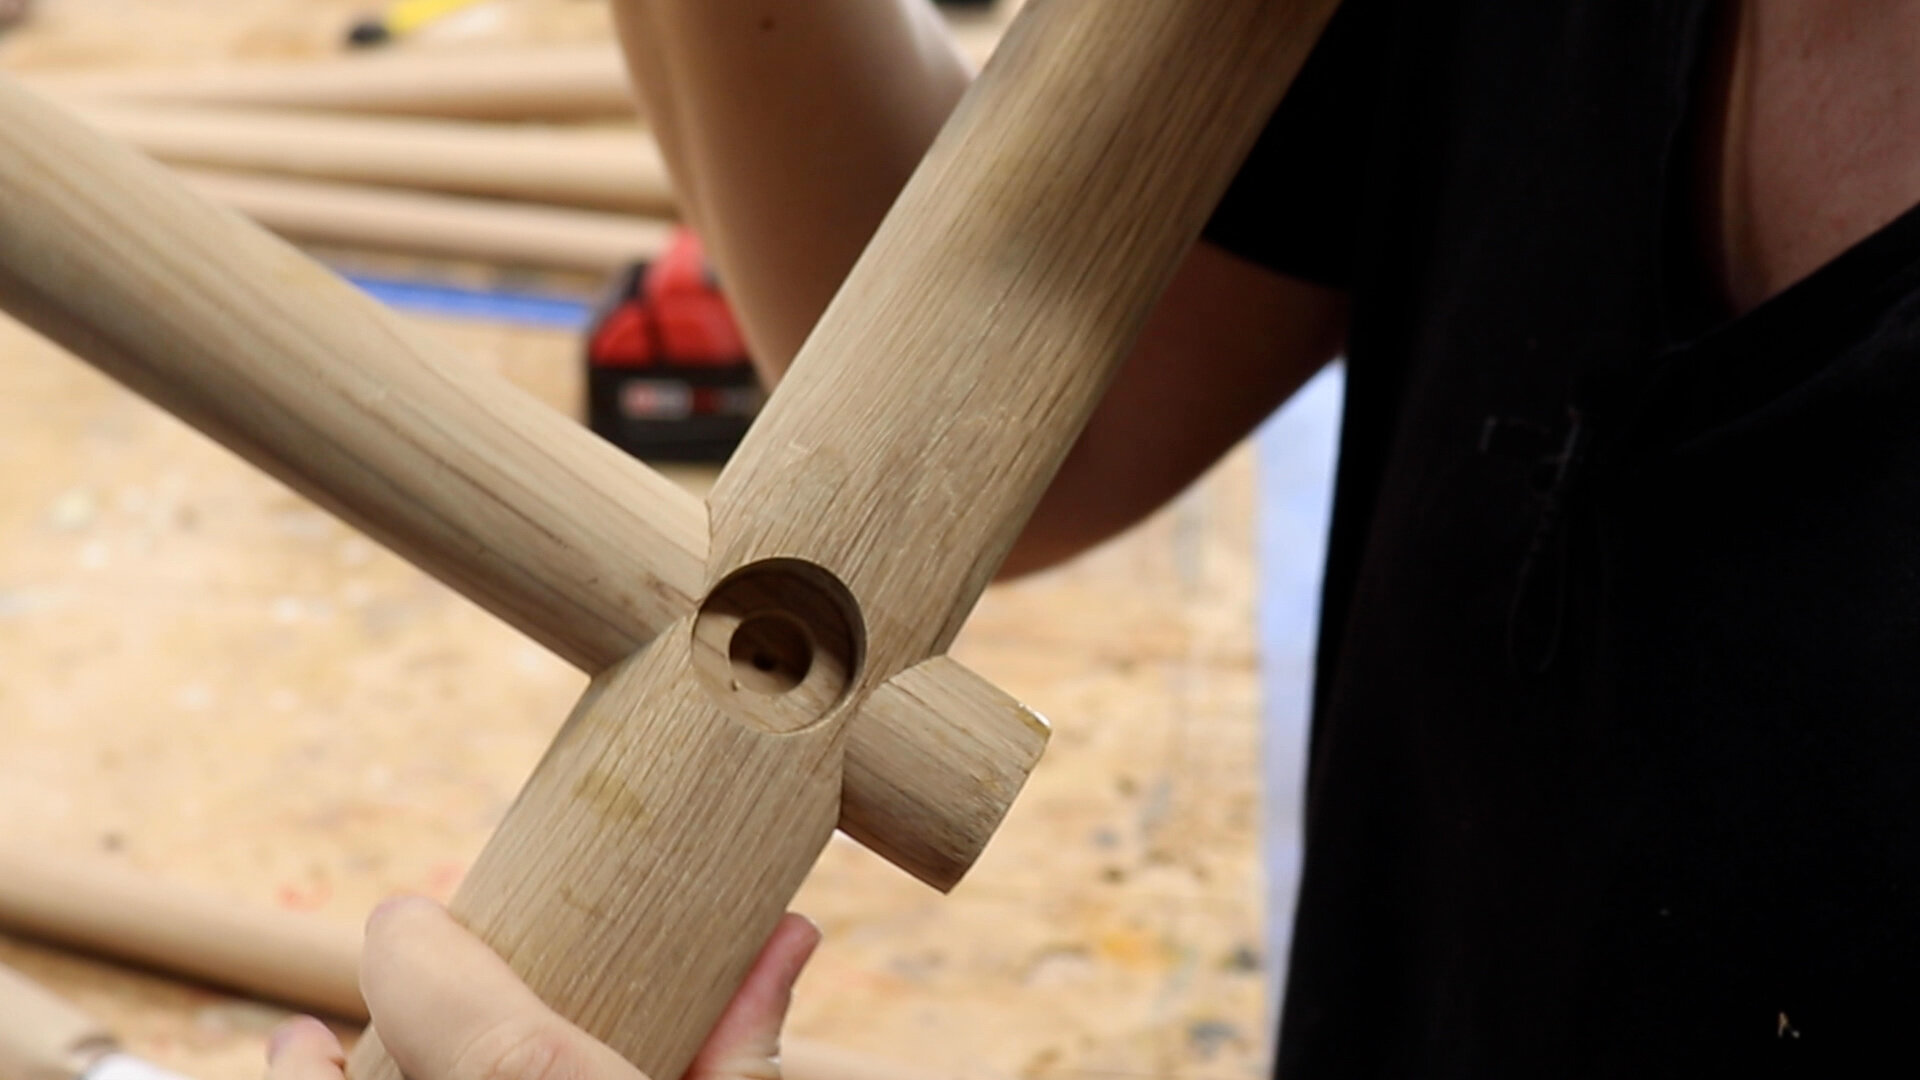
All the joinery is done, the sides just need to get glued together now!

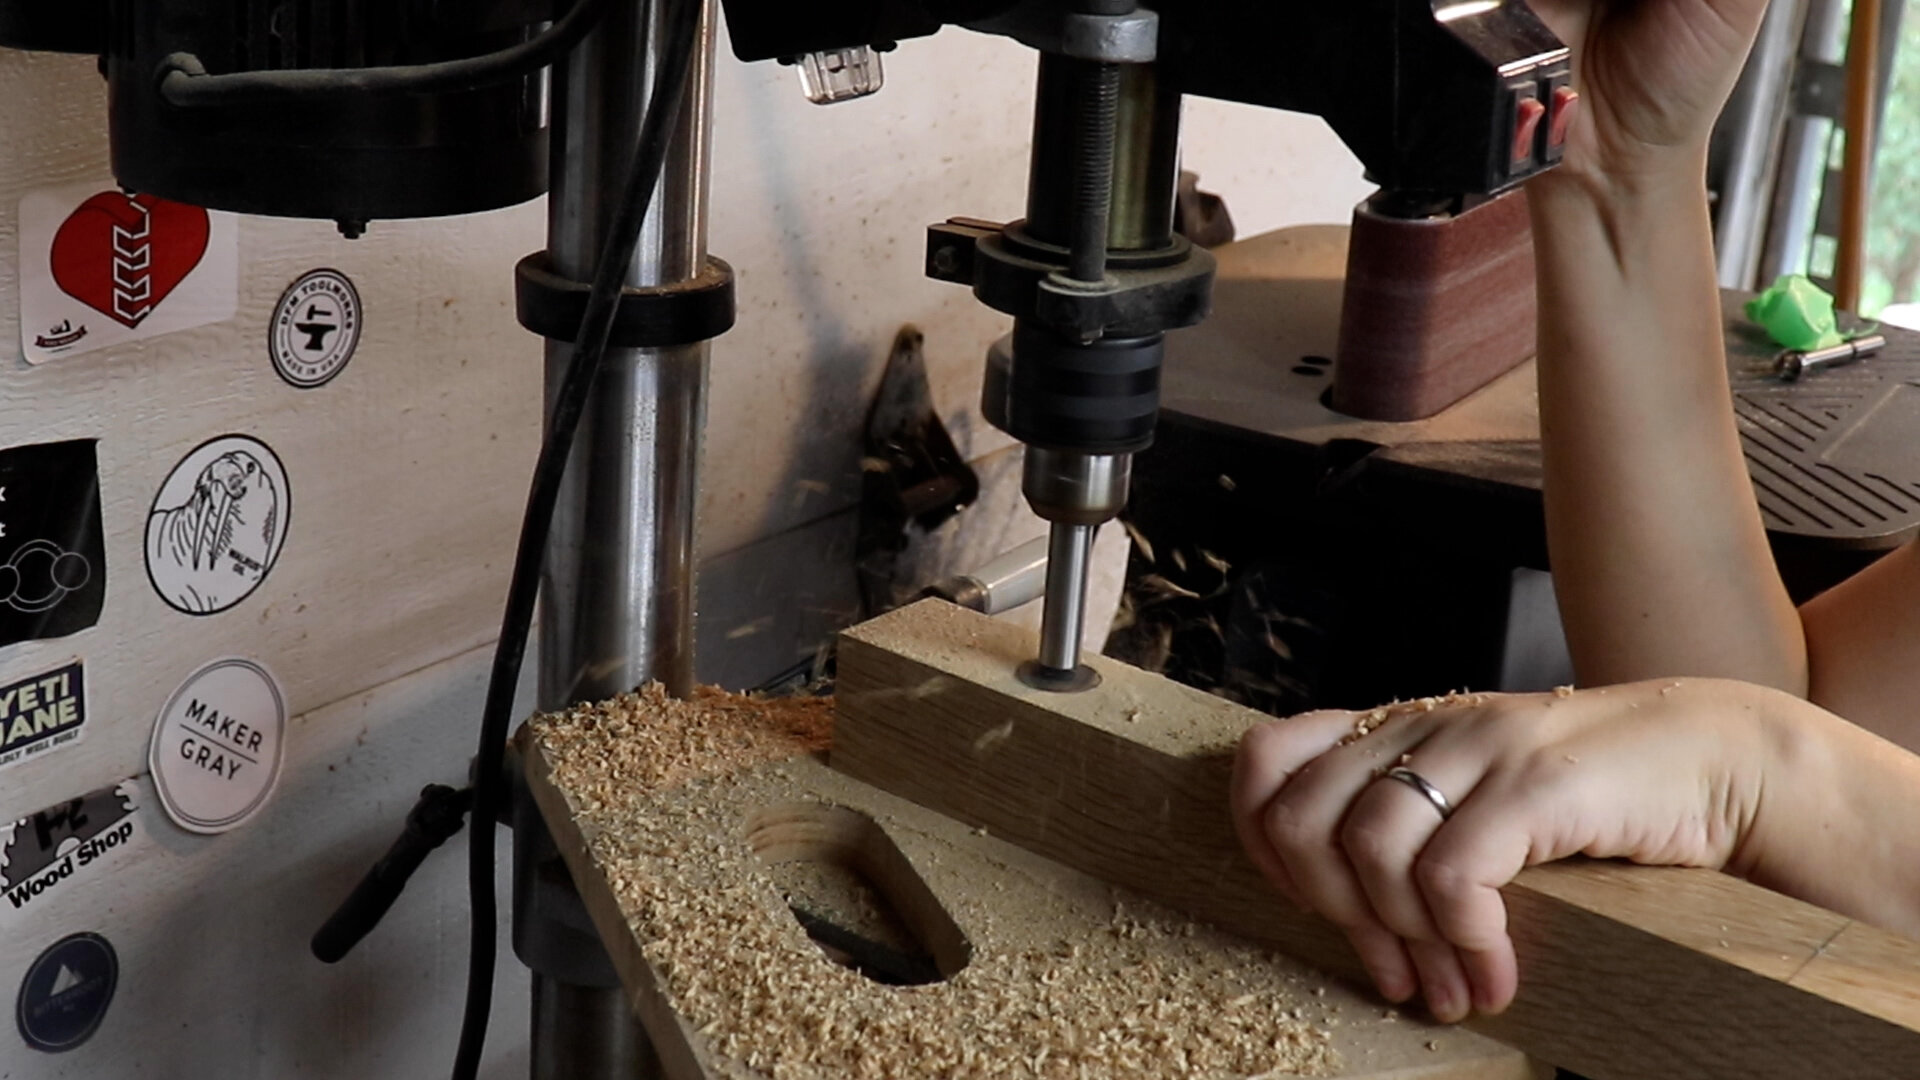
After the glue dried, I used one of the holes I drilled in the base piece before I turned it into a dowel as a guide to drill a bit deeper for the stretchers.

Then I used a slightly smaller forstner bit to drill a stepped hole.

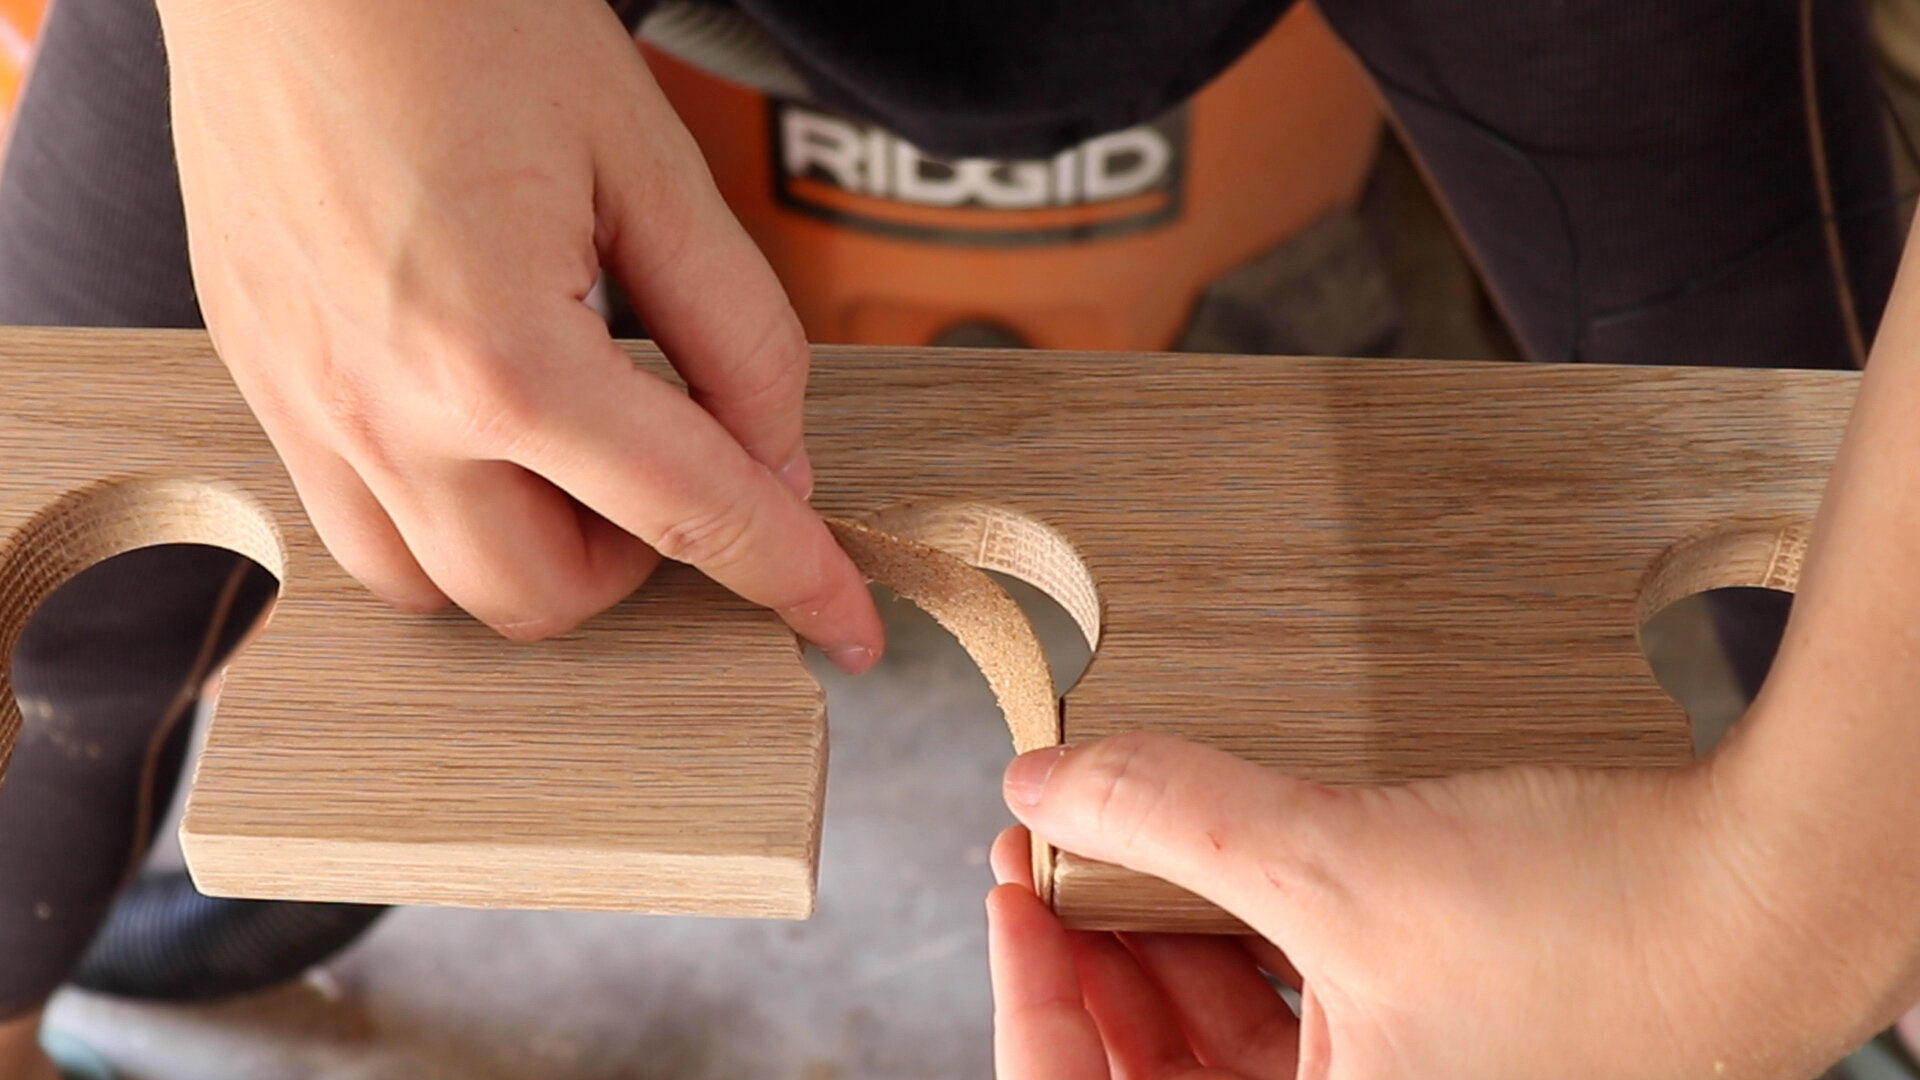
You can see below how the dowel stretcher will sit in the larger hole but there is another smaller hole. That smaller hole will be for a tenon on the end of the dowel stretcher.
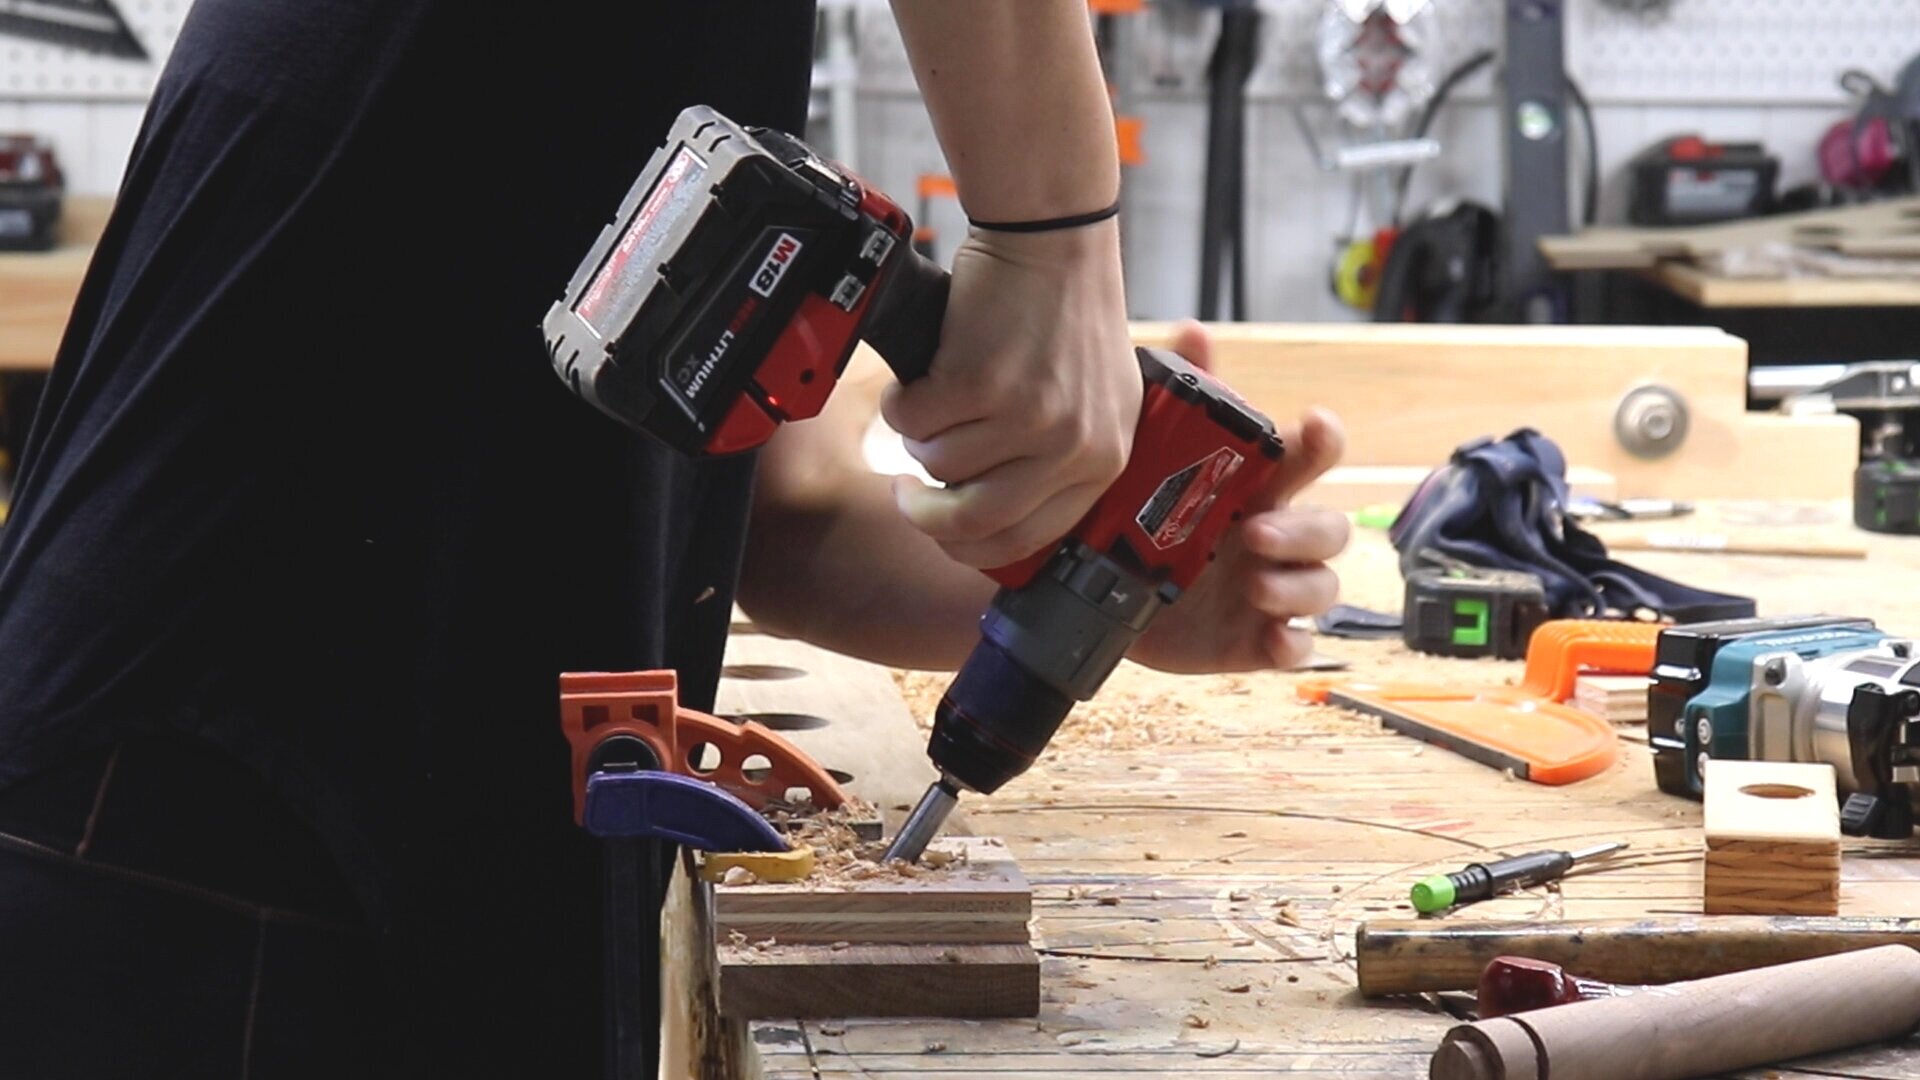
To make that tenon I simply set up a stop block at the outfeed of my router table so that it was the length of the tenon I needed.
Then I raised the bit so it was sticking up half the amount of the material I wanted to remove.
I had a 1” dowel, and I wanted a 1/2” wide tenon, so the bit was raised only 1/4”.
Easy enough!

Then I glued the dowel stretchers with the tenons into the side pieces!

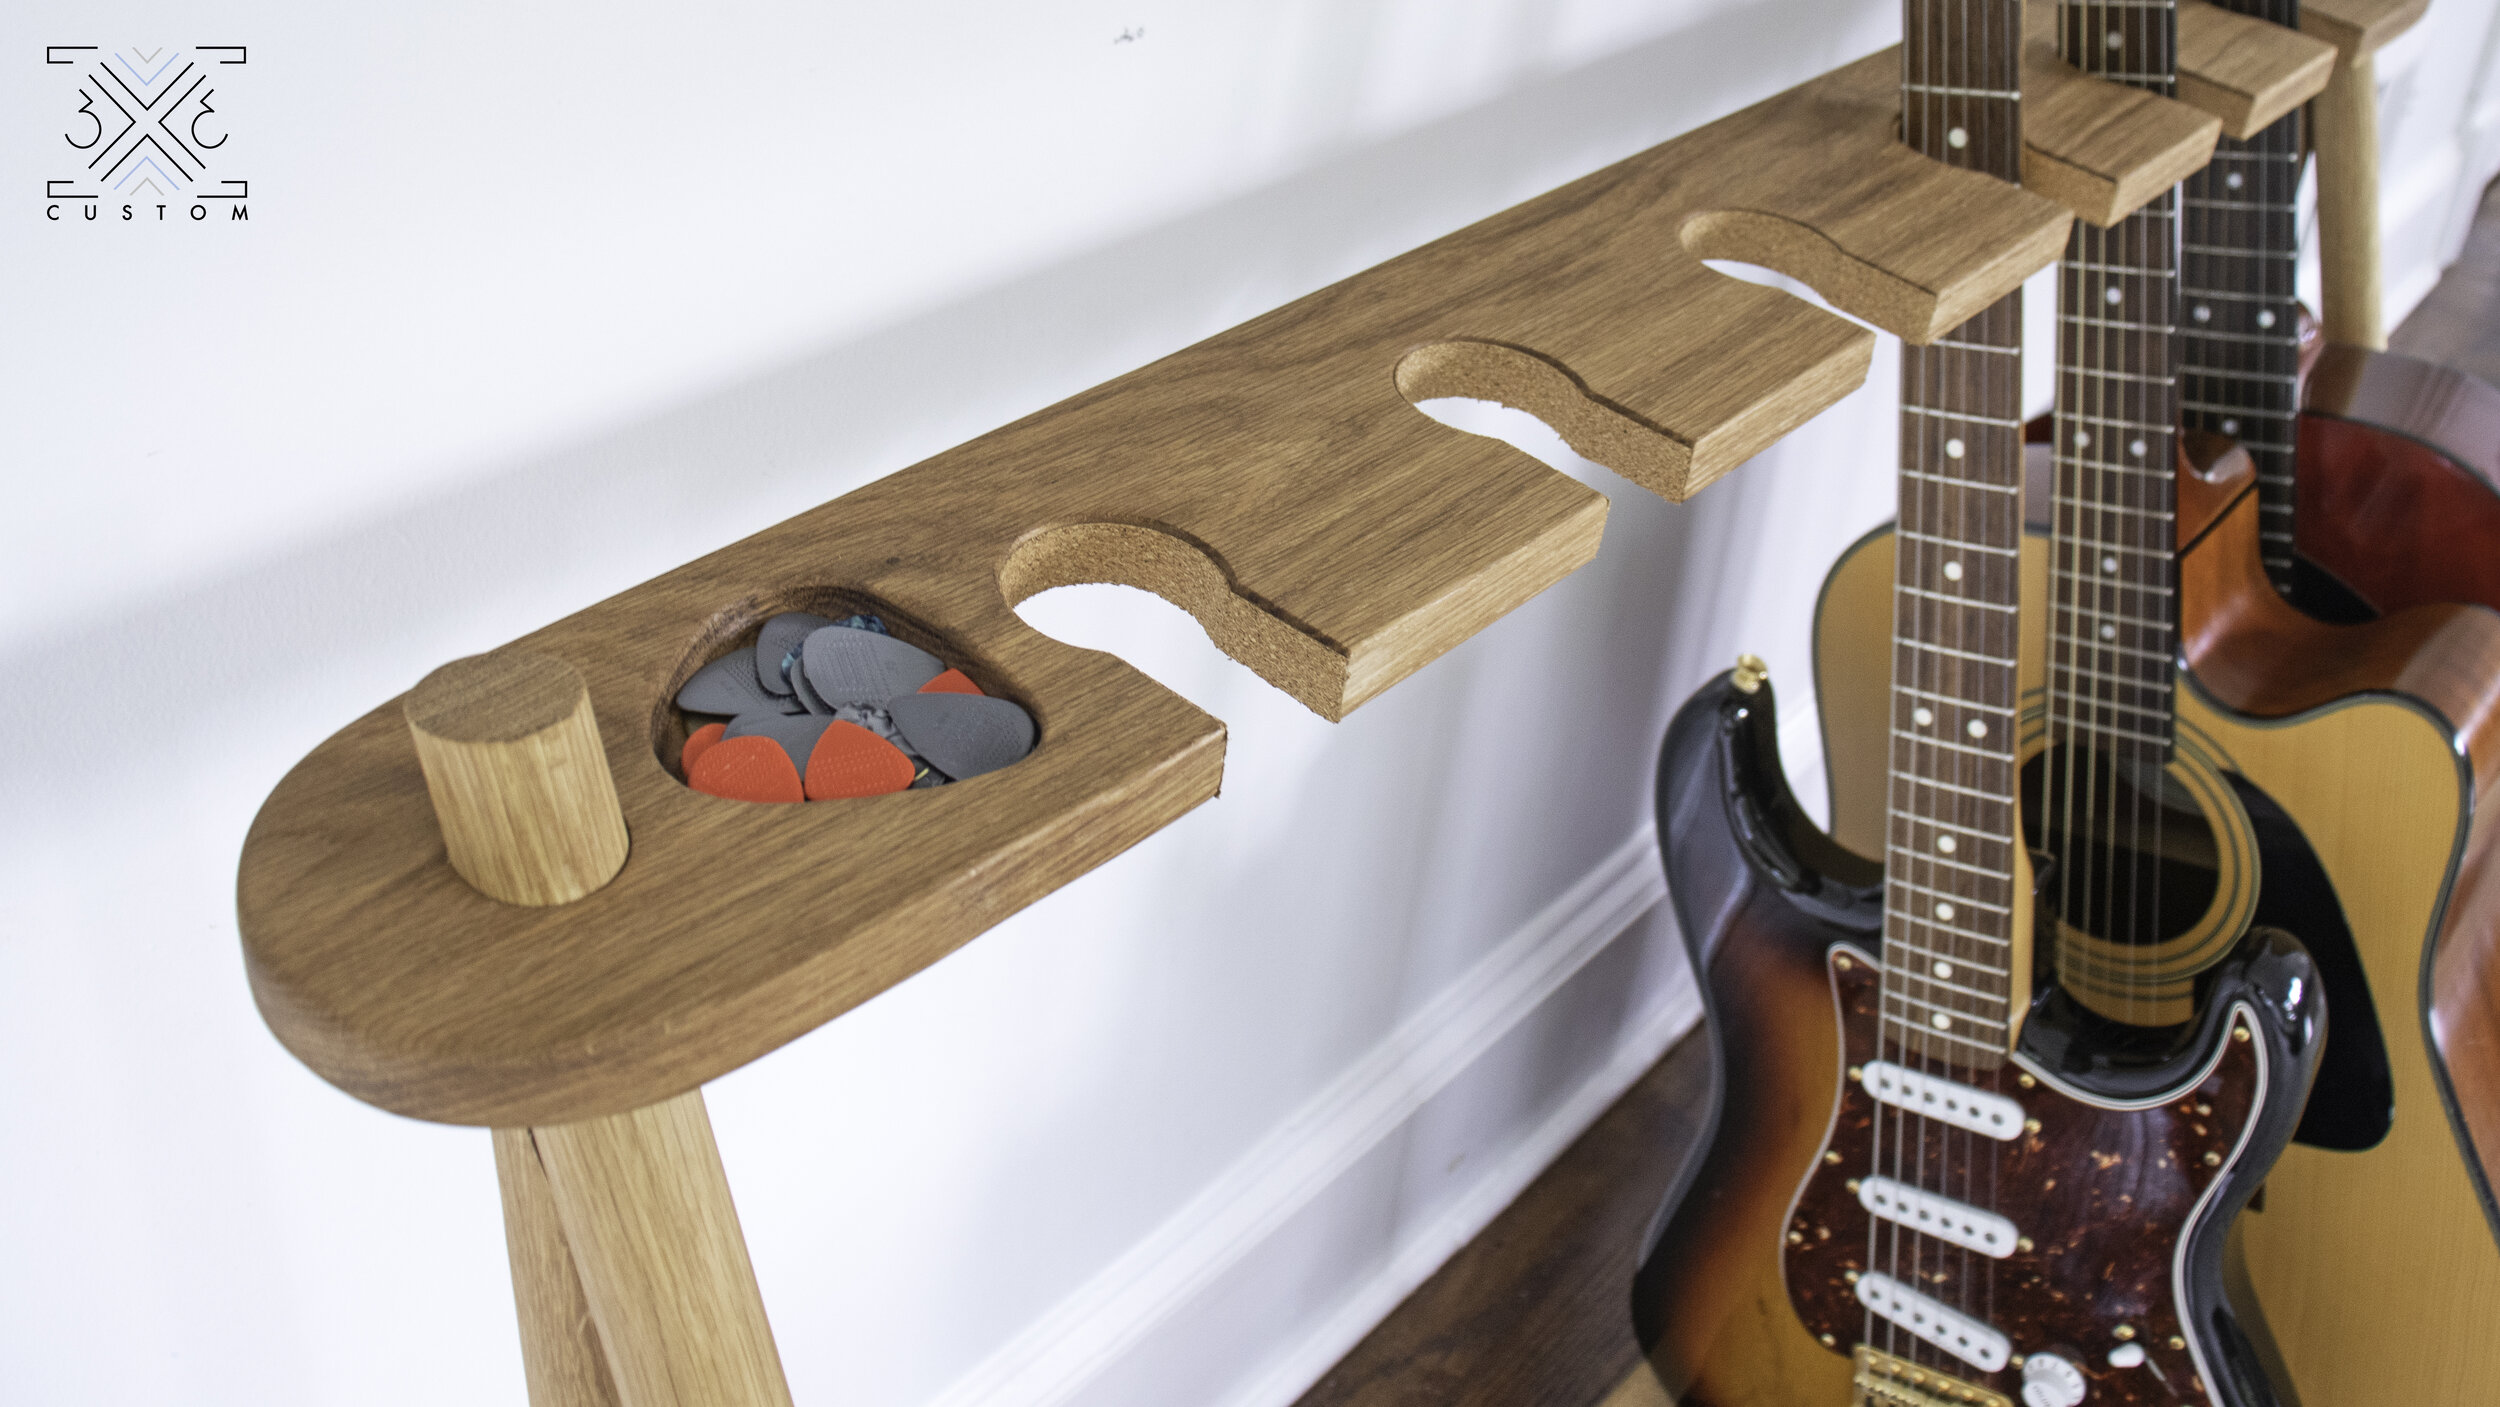
Time for the top!
I made a template that would hold 6 guitars comfortably.
But I also made them available for you to purchase! Check it out here - GUITAR RACK TEMPLATE

Use double sided tape to temporarily attach it to your workpiece.

Then use a flush trim bit to clean it up after rough cutting with a jigsaw!
Super simple!

Since the angled leg will be poking through the top, I drilled another 20º angled hole into the sides of the top.
I used a scrap piece of plywood with the correct angled hole in it as a guide.
Last little detail… I made a little carved out section on the top of the rack to hold some picks…
I used the Shaper Origin to cut this out, but this could easily be done with templates as well.

I glued the top on to the legs.
Cut off any excess dowels that were poking out.

Lined everything with cork.
Put on some finish.
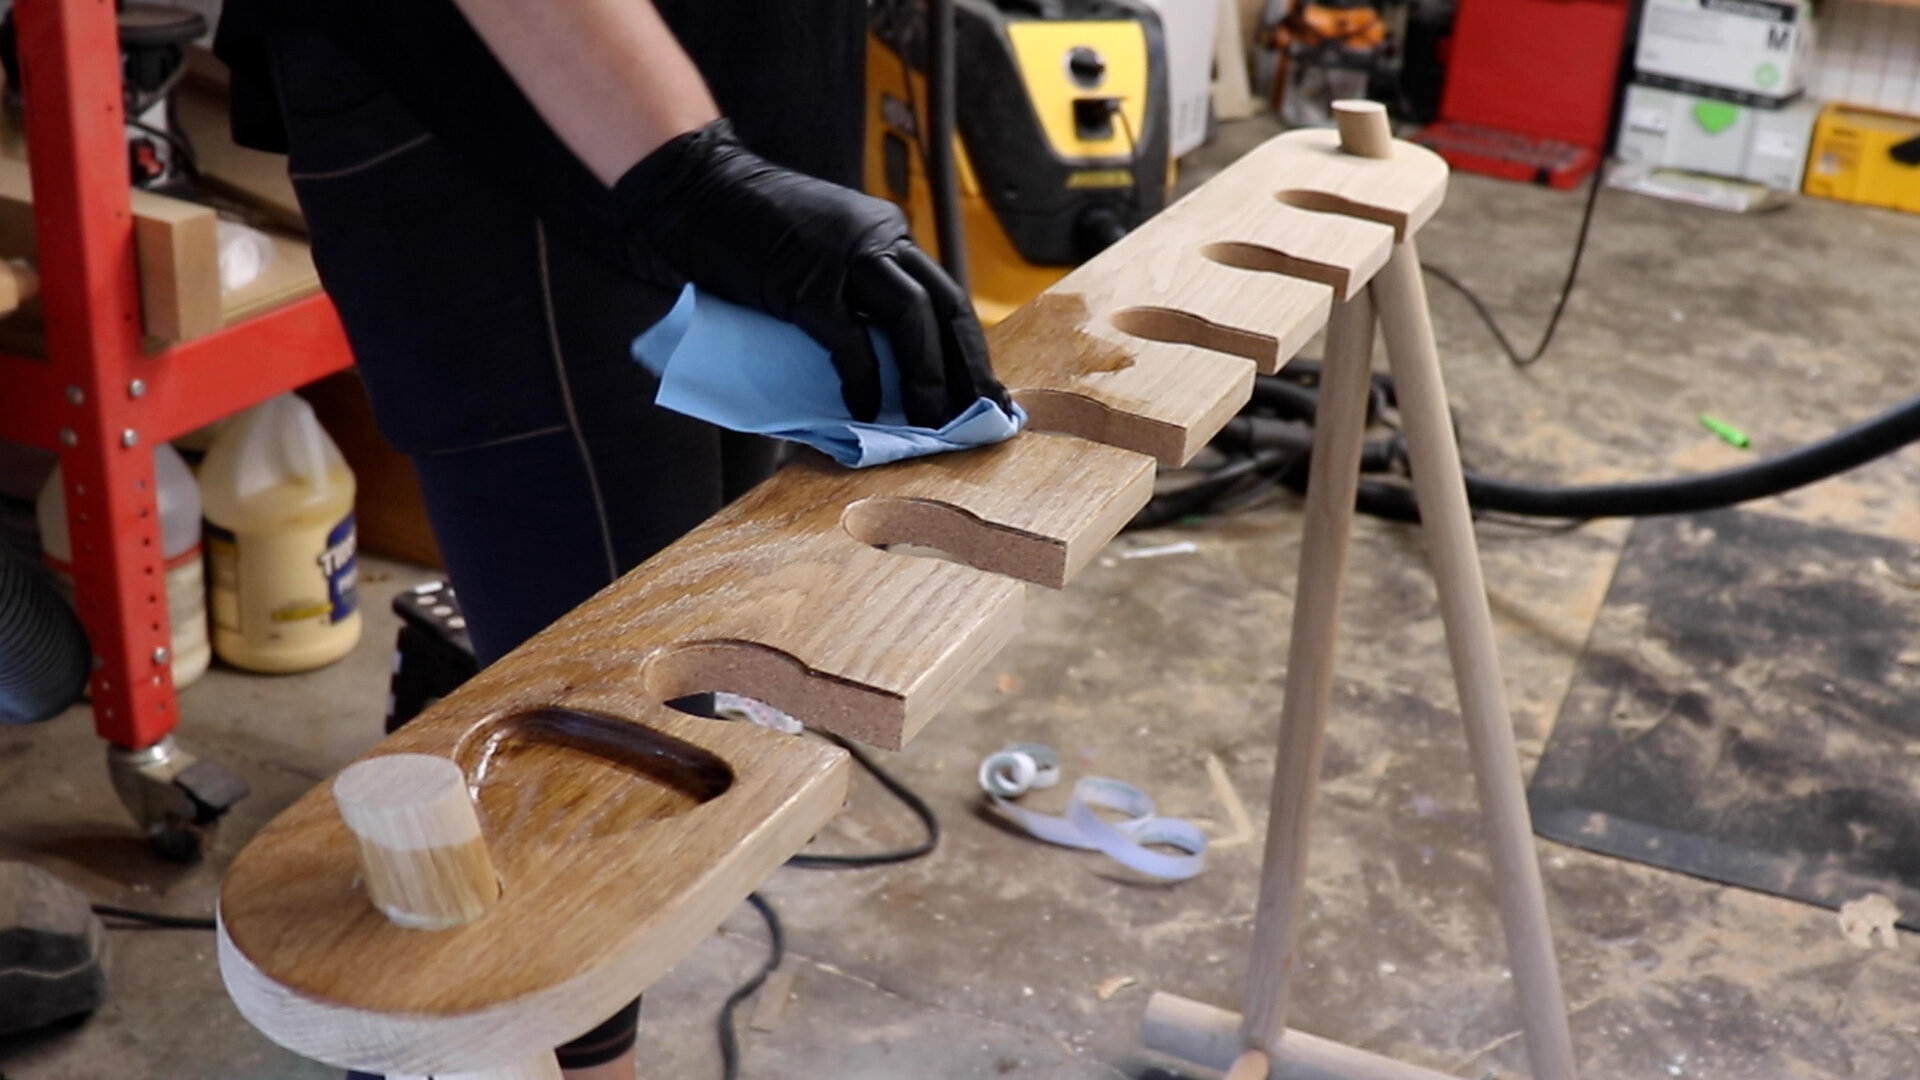
And it’s done!
I am so happy with how this turned out! I love how modern and sleek it looks while being super functional.
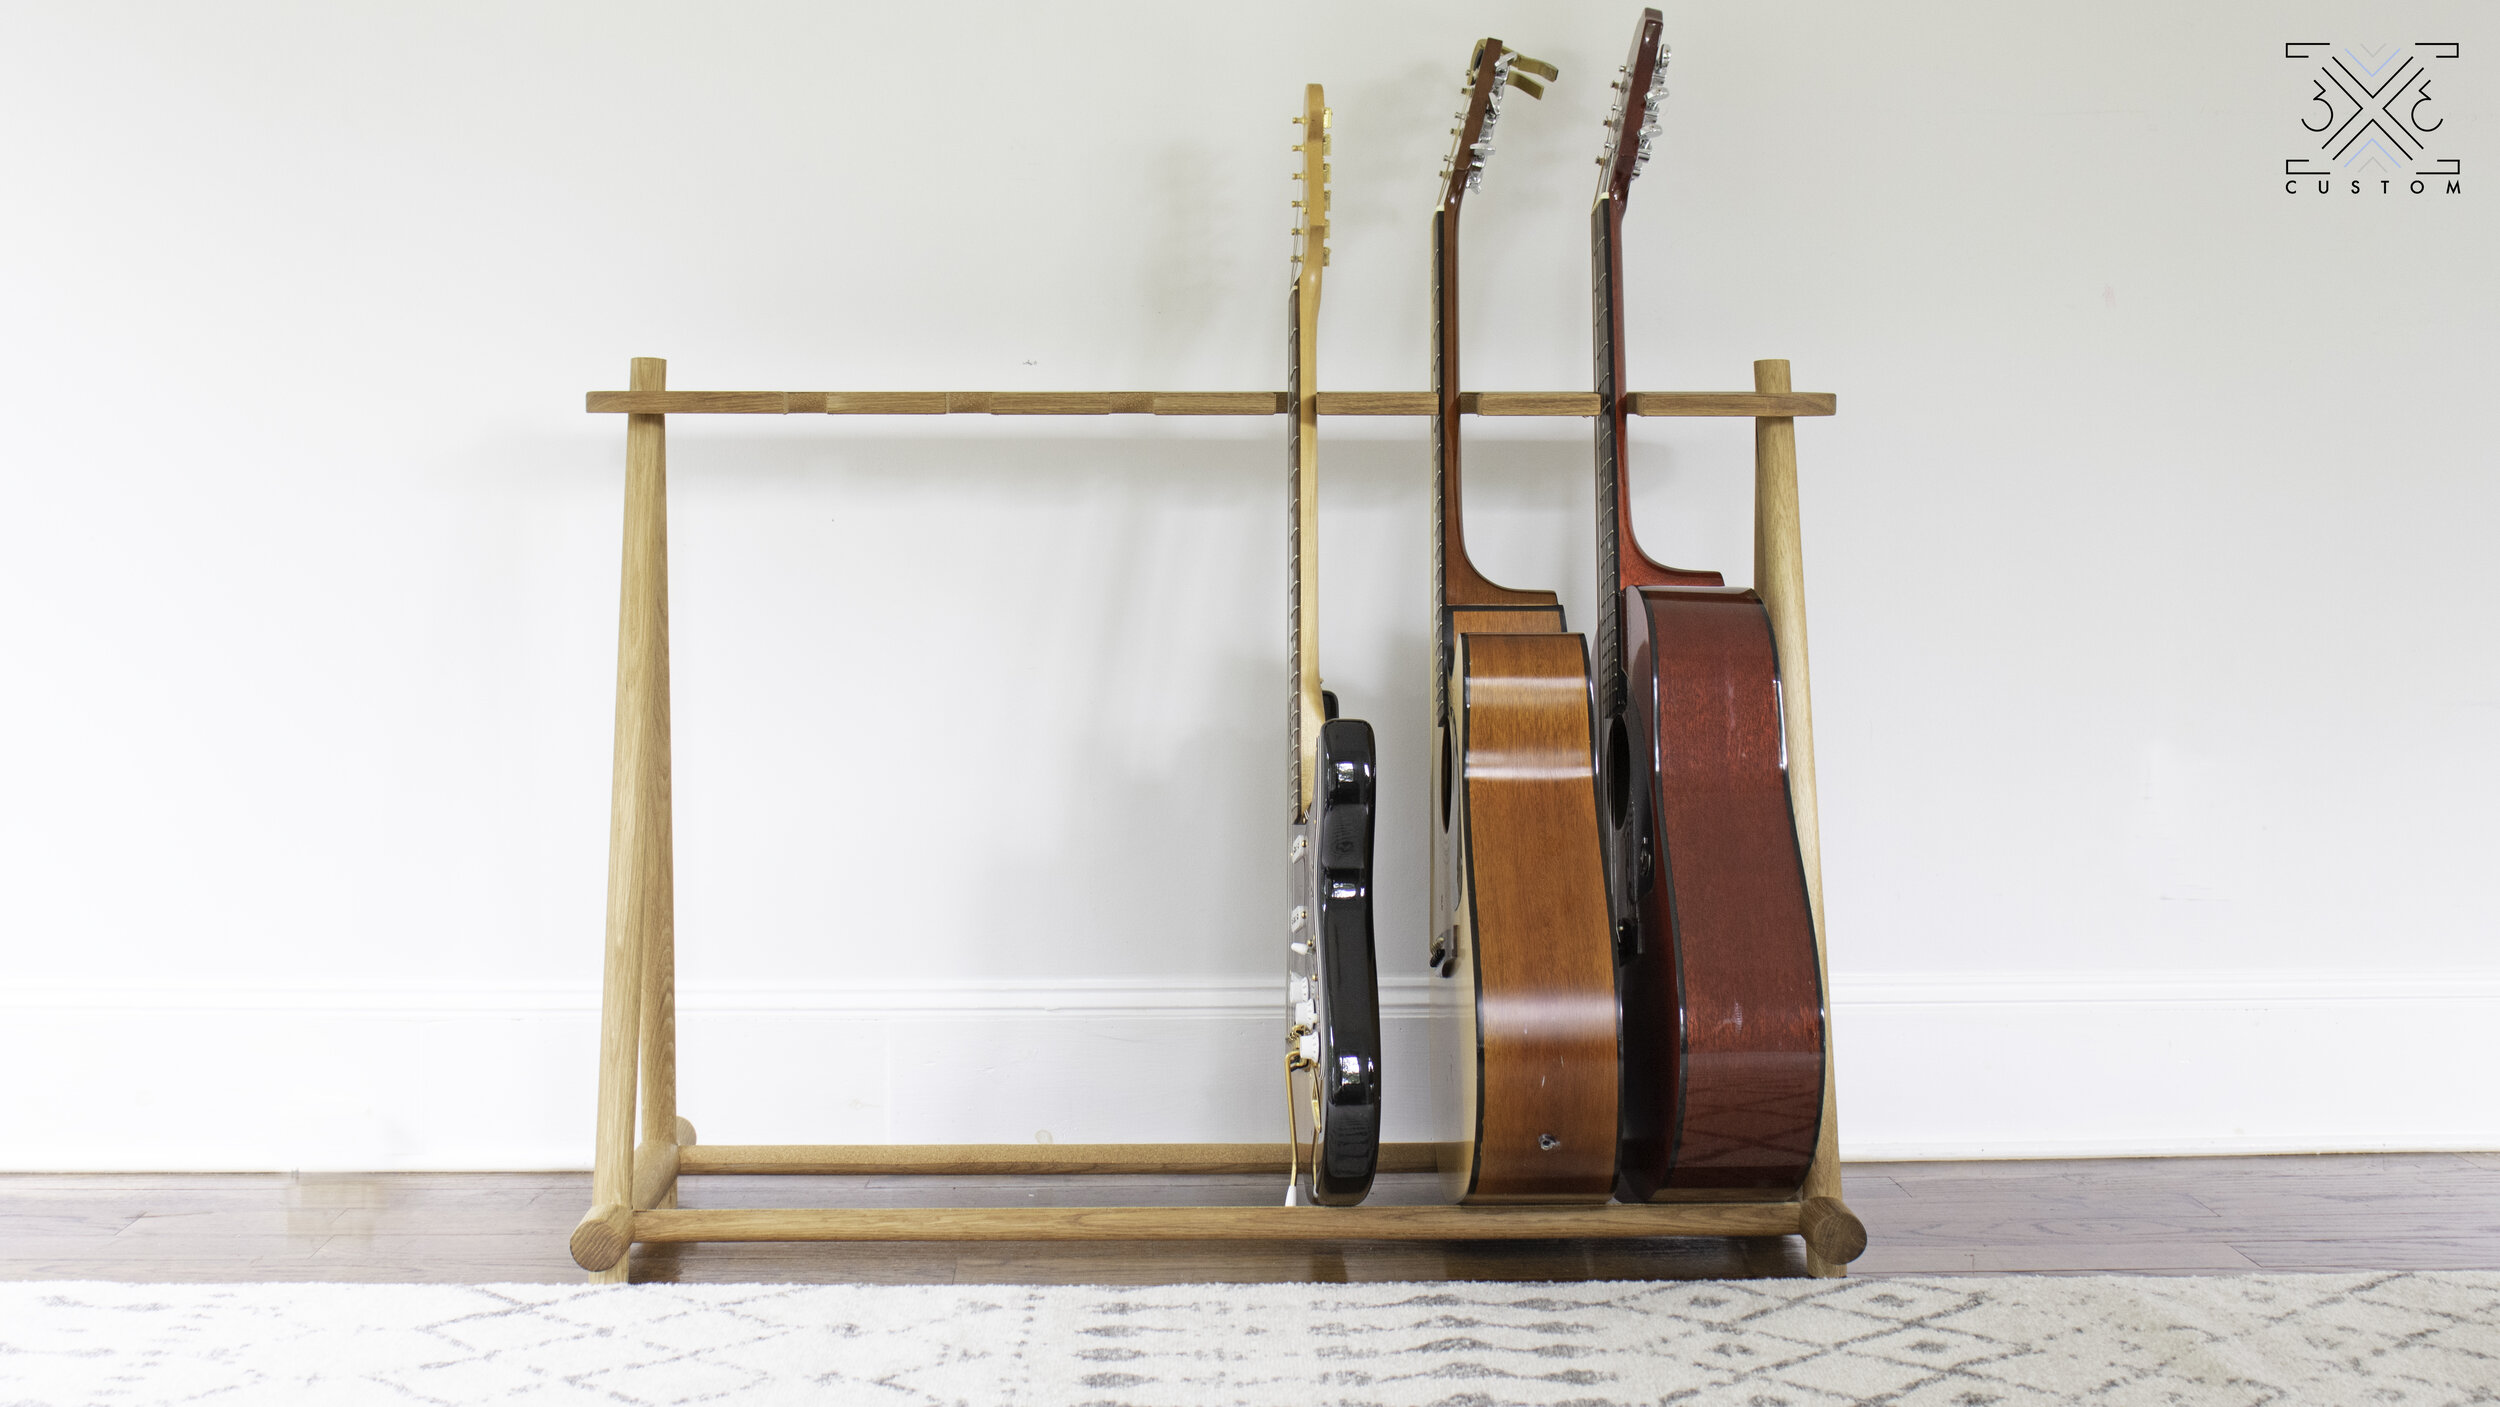
The dowels were definitely challenging to deal with, but all worth it in my opinion.
My favorite feature though is the built-in pick holder. How cool is this!!
So happy everything has a home now.
I can’t wait to see all the different versions you guys can come up with using the template.
